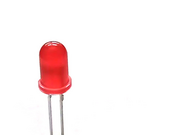
Using BTN1 to turn on an LED
Introduction
The button BTN1 on your Espruino is there for you to those. In this tutorial, I am going to show you how it can be used to turn on an LED, along with a few of the possible pitfalls that you may encounter.
Wiring Up
We will be using the LEDs and the user button on the board, so you're all set!
Software
We are going to start off very simple by just turning on LED1:
LED1.write(1);
Next, let us create a function that will alternate between turning LED1 on and off:
var next_state = 1;
function swap() {
  LED1.write(next_state);
  next_state = !next_state;
}
we can now simply type swap(); to turn the LED on when it was off or vice versa. The next step is to keep a watch for the button on the board and whether the user pressed it. For this, we have the function setWatch. However, this will be triggered twice: once when the button is pressed down, and once when the user releases the button. We only want our LED to change when the user presses down the button, so we need another function:
function swap_on_down() {
  if (digitalRead(BTN1) == 1) swap();
}
This function is very easy, and will just verify whether BTN1 is pressed down. As such, it won't call the function swap when the user removes his/her finger from the button. This is exactly what we want! Now we can use the setWatch and let it call swap_on_down:
setWatch(swap_on_down, BTN1, true);
The last true option is provided so that this watch-function will keep on calling our function `swap_on_down on successive presses of the button instead of only once. Try it, and you should see the red LED go on and off, each time you press the button.
Maybe even more fun is alternating the colours. The idea here is that, when we press the button, the red light comes on. When we press the button again, the green lights goes on. Next time, the blue goes on, after which another press of the button will turn the red light back on etc. As one added tough, we can add that all LEDS turn off after the user stopped pressing the button for 5 seconds.
// keep track of the next LED
var next_LED = 1;
// keep track of the ID, see later
var timeout_ID = 0;
function swap() {
  // remove the timeout to turn of all LEDs when the user pressed the button
  clearTimeout(timeout_ID);
  // determine which LED to turn on/off
  switch(next_LED) {
    case 1:
      LED1.write(1);
      LED3.write(0);
      break;
    case 2:
      LED2.write(1);
      LED1.write(0);
      break;
    case 3:
      LED3.write(1);
      LED2.write(0);
      break;
  }
  // determine the next LED to turn on
  next_LED = Math.wrap(next_LED, 3) + 1;
  // prepare a timeout to turn off all LEDs after a while
  // we capture the ID here, so that we can use it in a next call to this function
  timeout_ID = setTimeout(function () { LED1.write(0); LED2.write(0); LED3.write(0); }, 5000);
}
As you will see, this works as expected but returns an ERROR: Unknown Timeout at some times (when all LEDs are off). This is a good time to reflect on our code, and take the time to iron out some of the issues. We'll start with the error.
We can avoid the error by writing var timeout_ID = undefined; instead of var timeout_ID = 0;. We can then remove the timeout only when it is undefined:
  if (timeout_ID !== undefined) {
    clearTimeout(timeout_ID);
  }
Be careful to use !== instead of != to compare with undefined. This code above works because the ID generated when setting a timeout might be 0, but it will never be set to undefined. In fact, we can simplify the code even further and just write var timeout_ID;, as the variable will then be initialised to undefined. We are not done though. We need to change our timeout function, so that it will reset this ID to undefined once it is fired:
  timeout_ID = setTimeout(function () { LED1.write(0); LED2.write(0); LED3.write(0); }, 5000);
``

becomes
timeout_ID = setTimeout(function () { LED1.write(0); LED2.write(0); LED3.write(0); timeout_ID = undefined; }, 5000); ``
Finally, the Espruino code contains a feauture to only watch for the rising of a signal. This helps us, in that we don't even need the function swap_on_down! We can simply write:
setWatch(swap, BTN1, {repeat:true, edge:"rising"});
Notice that we no longer need to call the function swap_on_down, but that we directly call the function swap. The full code to iterate between the LEDs on each press of the button then becomes:
// keep track of the next LED
var next_LED = 1;
// keep track of the ID, see later
var timeout_ID;
function swap() {
  // remove the timeout to turn of all LEDs when the user pressed the button
  if (timeout_ID !== undefined) {
    clearTimeout(timeout_ID);
  }
  // determine which LED to turn on/off
  switch(next_LED) {
    case 1:
      LED1.write(1);
      LED3.write(0);
      break;
    case 2:
      LED2.write(1);
      LED1.write(0);
      break;
    case 3:
      LED3.write(1);
      LED2.write(0);
      break;
  }
  // determine the next LED to turn on
  next_LED = Math.wrap(next_LED, 3) + 1;
  // prepare a timeout to turn off all LEDs after a while
  // we capture the ID here, so that we can use it in a next call to this function
  timeout_ID = setTimeout(function () { LED1.write(0); LED2.write(0); LED3.write(0); timeout_ID = undefined; }, 5000);
}

setWatch(swap, BTN1, {repeat:true, edge:"rising"});
This page is auto-generated from GitHub. If you see any mistakes or have suggestions, please let us know.