Micro:Bit Voting
If you have a classroom of kids, one thing you might want to do is to make a voting system where children can do something with their Micro:bit and have it shown at the front of the class.
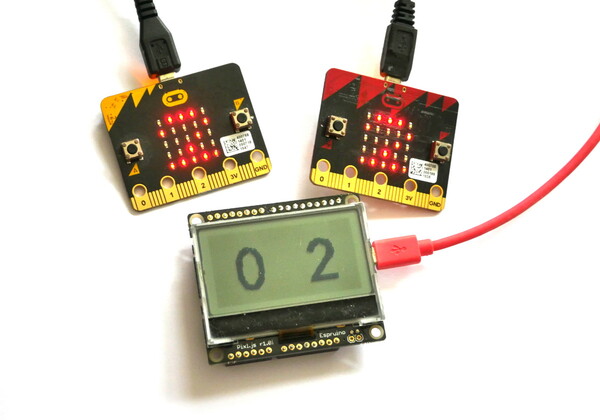
We're going to use a Pixl.js board with Espruino to receive data that is transmitted over Bluetooth by Micro:bits programmed with MakeCode and display it on the Pixl.js screen.
Because standard Eddystone Bluetooth advertising is used, multiple receivers can be made - using other Bluetooth LE Espruino devices or just a PC with special software.
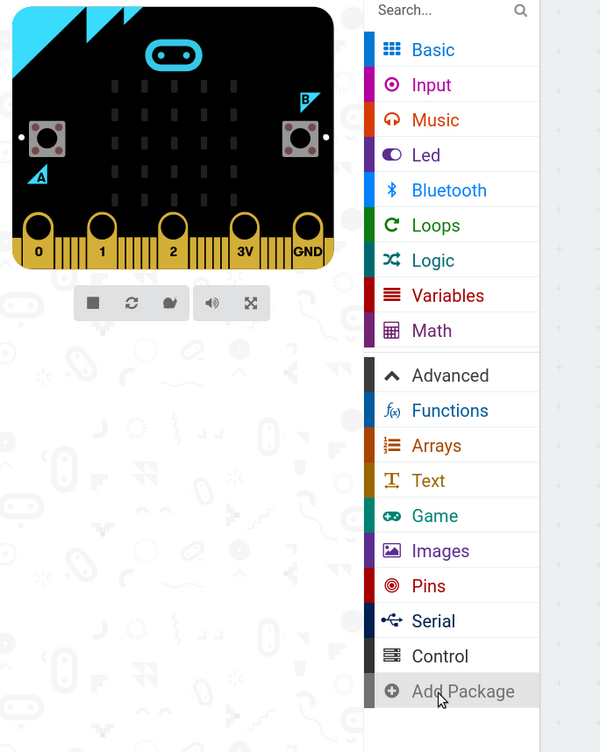
Micro:Bit software
- Go to MakeCode and ensure you're in
Blocksmode up the top. - Under the
Advancedheading clickAdd Package(you may have to expandAdvancedfirst)
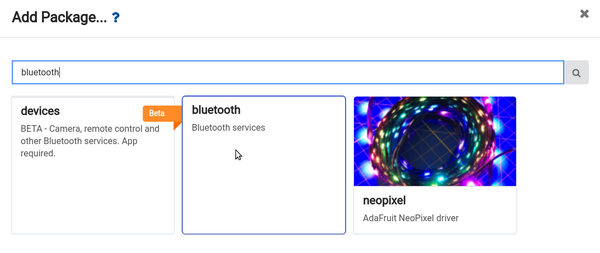
- Type
Bluetoothand click on theBluetoothpackage
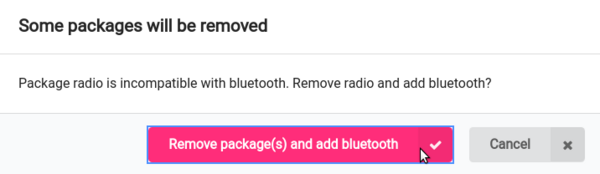
- Click
Yesto the dialog telling you that radio functions won't be available.
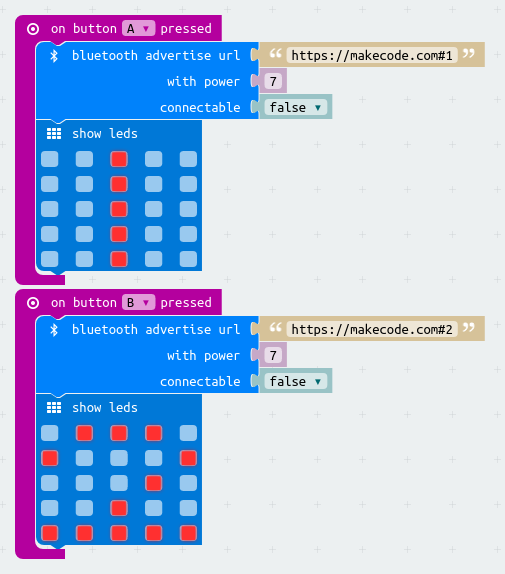
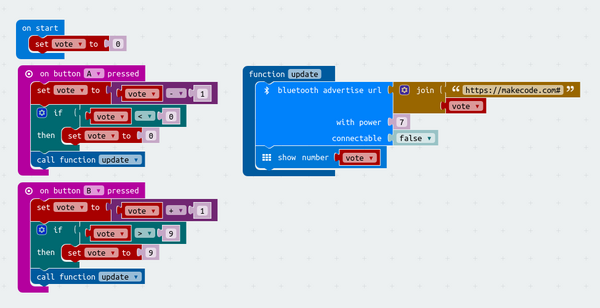
- Now pull in the
On Button A Pressedblock fromInput - Pull
bluetooth advertise urlfromBluetoothinto theOn Button A Pressed - Pull
show ledsfromBasicinto the end ofOn Button A Pressedas well - Right-click and duplicate all the blocks
- In the first block, change
https://makecode.comtohttps://makecode.com#1, and write1in theshow ledsblock - In the second block, change
On Button A PressedtoOn Button B Pressed,https://makecode.comtohttps://makecode.com#2, and write2in theshow ledsblock
Your code should look like this:
Click Download and save the file to each Micro:bit you're interested in.
Pixl.js Software
On the Pixl, we'll write code that scans for any advertised URLs that contain
a # character, and use the text after the # as a vote.
For Pixl.js, follow the Getting Started Guide to get connected with the Espruino IDE.
Copy and paste the following code to the right-hand side of the IDE and click Upload,
and you're done!
// List of eddystone devices
var eddystone = {};
// List of votes
var votes = {};

// Start scanning for devices
NRF.setScan(function(dev) {
  if (dev.serviceData && dev.serviceData.feaa)
    eddystone[dev.id] = dev;
});

/* Every so often, scan over the list of devices
we have and tally up the votes */
setInterval(function() {
  // reset votes
  votes = {};
  // tally them up
  for (var id in eddystone) {
    var dev = eddystone[id];
    if (!dev.age) dev.age=0;
    dev.age++;
    // only use votes from devices we heard from recently
    if (dev.age < 40) {
      // if the URL contains a hash, the vote is what comes after
      var url = E.toString(dev.serviceData.feaa).substr(3);
      var hash = url.lastIndexOf("#");
      if (hash) {
        var vote = url.substr(hash+1);
        if (vote in votes)
          votes[vote]++;
        else
          votes[vote]=1;
      }
    }
  }
  // now display on the screen
  g.clear();
  g.setFontVector(40);
  g.setFontAlign(0,0);
  g.drawString(0|votes["1"], g.getWidth()/4, g.getHeight()/2);
  g.drawString(0|votes["2"], 3*g.getWidth()/4, g.getHeight()/2);
  g.flip();
}, 500);
Type save() to write this code to Pixl.js so it'll be run automatically
even after power is removed and restored.
More functionality
Since anything after a # is used as a vote, you can easily have more than
two items to vote with. The following code for MakeCode will vote with
a number between 0 and 9 (changed by pressing the A and B buttons)
You can then pick up the results in the votes variable. For instance to
display a bar graph instead of 2 numbers, just change the code at the end of
the setInterval to:
// now display on the screen
g.clear();
g.setFontAlign(0,0);
for (var i=0;i<10;i++) {
  g.fillRect(i*12, 55-(0|votes[i])*10, i*12+11, 55);
  g.drawString(0|votes[i], i*12+5, 60);
}
g.flip();
You could also use the Arduino connectors on the back of the Pixl.js to connect extra hardware that can be controlled by the Micro:bits, for instance motors, WiFi connection, or large LED displays.
This page is auto-generated from GitHub. If you see any mistakes or have suggestions, please let us know.