CC3000 WiFi Module
The TI CC3000 has now been discontinued. We'd recommend that you use the ESP8266 module instead - it's significantly cheaper, lower power, and easier to wire up.
Note: The CC3000-specific build for Original Espruino board had to be removed for Espruino 2v01. You can however still flash firmware 2v00 from https://www.espruino.com/binaries/espruino_2v00_espruino_1r3.bin
The Espruino Original and Pico support the Texas Instruments CC3000 WiFi module. This allows you to connect to Wireless networks (and hence the internet).
To use this, you need to update your device's firmware, and when prompted for the firmware to upload choose the CC3000 option.
Then, you need to connect the module. Currently it must be on the following pins:
| CC3000 | Espruino |
|---|---|
| GND | GND |
| 3v3 | Do not use |
| VIN | VBAT |
| CLK/SCK | B3 |
| DOUT/MISO | B4 |
| DIN/MOSI | B5 |
| CS | B6 |
| EN/VBEN | B7 |
| IRQ | B8 |
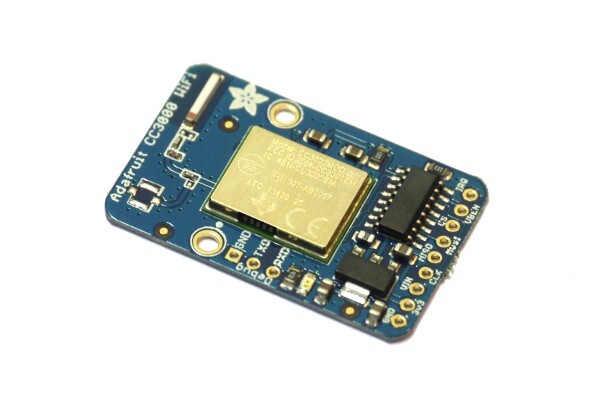
Note: The voltage regulator on the Adafruit CC3000 module will work with voltages as high as 18V on VIN. If using a different breakout board, you must be sure that the voltage applied to the CC3000 (Vcc) is between 2.7 and 4.8v. On the Espruino Board, VBAT is 4.3v when running from USB and is the same as the battery voltage when plugged into a battery.
Using the CC3000 is as follows:
- Connect it as above CC3000
- Load the CC3000 module with
require("CC3000").connect(). This returns aWLANobject. - Call
connecton that object (see the example below), with a callback function - In the callback function, respond to the
dhcpmessage and use thehttpmodule to access the internet
Note: Some calls to the CC3000 module will take a second or more to return, due to TI's driver. connect especially takes several seconds. In order to make sure your code uploads properly (and that you can save your code to flash), the code to initialise the CC3000 should be put inside a function called onInit. Execute onInit() manually on the left-hand side after uploading, or type save() to save your code to Flash and run it.
This example loads a webpage and prints the result:
var wlan = require("CC3000").connect();
wlan.connect( "AccessPointName", "WPA2key", function (s) {
  if (s=="dhcp") {
    require("http").get("http://www.pur3.co.uk/hello.txt", function(res) {
      res.on('data', function(data) {
        console.log(">" + data);
      });
    });
  }
});
Note: that we're putting all the network initialisation in the callback. The CC3000 will occasionally disconnect (or will sometimes crash and have to be automatically rebooted) and any active HTTP servers or clients will get removed. When it reconnects the callback will be called with s=='dhcp' and you can re-add them. Your code needs to be able to cope with the fact that it may be called more than once (eg. if you use setInterval make sure you use clearInterval to clear the old interval first).
Custom Pins
Calling require("CC3000").connect() without arguments will use the default pins shown above, but you can use a custom SPI device and pins by specifying them as follows:
SPI1.setup({ sck:B3, miso:B4, mosi:B5, baud:1000000, mode:1});
var wlan = require("CC3000").connect(SPI1, B6 */ CS */, B7 /* EN */, B8 /* IRQ */);
Note: It's very important that SPI mode is set to 1, or the CC3000 will not be able to initialise.
Disconnecting
You can also call wlan.disconnect() which will turn the CC3000 off completely. This is very useful if you're running off a battery and want to connect to the internet, send data, and then disconnect.
You could use it like this:
var wlan = require("CC3000").connect();

function getTime() {
  // if we don't get DHCP or a complete request in 30 seconds,
  // disconnect
  var failTimeout = setTimeout(function() {
    console.log("Timed out, disconnecting...");
    wlan.disconnect();
  }, 30000);
  wlan.connect( "AccessPointName", "WPA2key", function (s) {
    if (s=="dhcp") {
      require("http").get("http://www.pur3.co.uk/time.php",
                          function(res) {
        // store the result
        var result = "";
        res.on('data', function(data) {
          result += data;
          console.log(data);
        });
        /* When the connection closes, print what we
        got, and then disconnect from WiFi */
        res.on('close', function() {
          console.log("Got: "+result);
          // finished, disconnect anyway
          setTimeout(function() {
            clearTimeout(failTimeout);
            console.log("Complete!, disconnecting...");
            wlan.disconnect();
          },1000);
        });
      });
    }
  });
}

// Every 24 hours, get the time again
setInterval(getTime, 24*60*60*1000);
Web Server
Creating a Web Server is easy too:
var wlan = require("CC3000").connect();
wlan.connect( "AccessPointName", "WPA2key", function (s) {
  if (s=="dhcp") {
    console.log("My IP is "+wlan.getIP().ip);
    require("http").createServer(function (req, res) {
      res.writeHead(200, {'Content-Type': 'text/plain'});
      res.write('Hello World');
      res.end();
    }).listen(80);
  }
});
When the CC3000 connects to your network, it'll output My IP is 1.2.3.4. If you then go to http://1.2.3.4 with your web browser, you'll see a webpage saying Hello World.
If you want to do something a bit more interesting, you can turn lights on and off and view the status of inputs:
function onPageRequest(req, res) {
  var a = url.parse(req.url, true);
  res.writeHead(200, {'Content-Type': 'text/html'});
  res.write('<html><body>');
  res.write('<p>Pin is '+(BTN.read()?'on':'off')+'</p>');
  res.write('<a href="?led=1">on</a><br/><a href="?led=0">off</a>');
  res.end('</body></html>');
  if (a.query && "led" in a.query) digitalWrite(LED1, a.query["led"]);
}

var wlan = require("CC3000").connect();
wlan.connect( "AccessPointName", "WPA2key", function (s) {
  if (s=="dhcp") {
    console.log("My IP is "+wlan.getIP().ip);
    require("http").createServer(onPageRequest).listen(80);
  }
});
Note that to read the state of the button with this example, you'll have to press the button down and then press refresh in your web browser. Turning the LED on and off is done by loading a webpage with a certain name.
For more examples, please see the Internet page.
Using
 Converting files to Strings
 IoT Services
 WiFi Enabled Thermometer
 Remote Control Sockets
 Graphical Web Interface
 Wifi Remote Console
 WiFi Xively Humidity/Temperature Sensor with Display
 HTTP Image Loader
HTTP File Server
HTTP Image Loader
HTTP File Server
Buying
At the moment the only CC3000 module that we know works for sure is the AdaFruit CC3000 module, so we'd recommend that you get this one.
The CC3000 is no longer being manufactured, but we do still have a few left in our online shop.
The Embedded Adventures module has been tested and does not currently work with Espruino. If you have success with it, please let us know!
This page is auto-generated from GitHub. If you see any mistakes or have suggestions, please let us know.