Individually Addressable LEDs
Introduction
In the last few years, individually addressable RGB lights have been getting cheaper and cheaper. These lights contain a small controller chip alongside the RGB LED which makes it show a certain colour. The controller chips have a serial data input and output, and can be daisy-chained together. In this way you can control many different lights using just a few control wires (rather than needing wires going to each individual light).


There are two main types of Individually addressable LED at the moment - 3 wire and 4 wire.
LEDs like the WS2801 use 4 wires - ground, power, clock and data. They can be controlled using SPI, which is available on most microcontrollers. There are some small disadvantages though:
- You need 4 wires between each LED (which increases cost)
- The package for the controller/LED needs more wires, increasing size and cost
Many newer controllers use 3 wires, like the WS2811/WS2812/APA104/APA106 and SK6812. The use a one-wire style serial protocol, which only requires (as the name suggests) one wire for data. This means:
- Only 3 wires between each LED
- The controller chip fits in a smaller package, which fits on a smaller PCB
- Many LEDs (in fact all apart from the WS2811) put the controller chip inside the LED package itself.
All this adds up to make RGB LED lighting that is significantly cheaper than the WS2801 controller.
In this tutorial we'll show you how to drive these 3 wire LEDs from Espruino. The LEDs require a series of pulses at 800 kHz, where a 0 bit is a short pulse, and a 1 bit is a long pulse. There's a special neopixel library for interfacing with these devices.
You'll Need
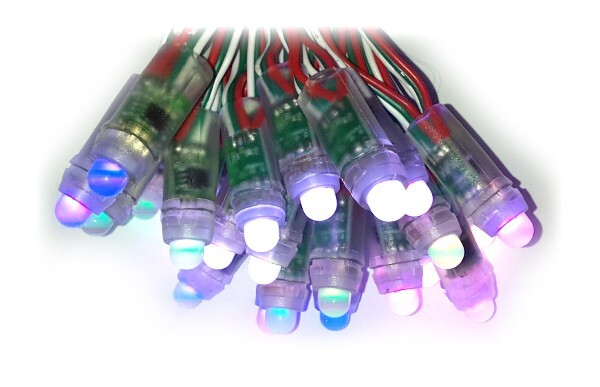
- A chain of WS2811 style lights. I'll be using individually wired ones (rather than the ones on a flexible PCB) in a string of 25.
- An Espruino board
Wiring Up
Check out the neopixel library reference - WS2811 style LEDs can be quite picky about the voltage of the data wire. Using the Original Espruino and Pico is easy, but other boards may require a little more thought.
Your WS2811 LED light chain should have two ends, with 3 wires at each end (some may be duplicated). The colours for these are Red, White and Green. Red is 5v power, White is Ground, and Green is Signal. If you have instructions with your LED light chain, please use those instead.
At one end, the signal is an input, and at the other it is an output - so that you can chain more than 50 lights together. On the lights we have, the female plug is the input - however if you can see DI/DO markings on the LEDs or you have other documentation, use that instead.
So to wire up, all you need to do is:
Connect White (0v) and Red (5v) wires to a 5v power source. You probably shouldn't use USB, as when all on, 50 LEDs draw around 1A - which is too much!
Connect White to ground on the Espruino board, and Green to an SPI MOSI pin on your Espruino board. On the Espruino Board, B15 is good (although there are others available). On discovery boards this is usually A7, and on Maple/Olimexino boards it is D11. However if in doubt please check the Reference for your board.
Software
So now it's connected up, we need to send some data. We'll send data to the first light. The data is transmitted as sets of bytes for red, green, and blue:
require("neopixel").write(B15, [255,0,0]);
This will make the first LED red.
Note that we're using pin B15 here - if you want to use a different pin (see the wiring up section) then you'll have to change this, but on most devices you'll need to make sure the pin is capable of hardware SPI MOSI. Puck.js can use any pin for this.
We can do other colours too:
require("neopixel").write(B15, [0,255,0]); // green

require("neopixel").write(B15, [0,0,255]); // blue

require("neopixel").write(B15, [255,255,255]); // white
And we can then control a second or third LED by just sending more data:
require("neopixel").write(B15, [255,0,0, 0,255,0, 0,0,255]);
So now, we could make a function with a for loop that would create colours for every LED. This one just makes all 50 LEDs progressively brighter white (the first LED will be off) :
var rgb = new Uint8ClampedArray(25*3);

function getPattern() {
  for (var i=0;i<rgb.length;i+=3) {
     rgb[i  ] = i*10;
     rgb[i+1] = i*10;
     rgb[i+2] = i*10;
  }
}
Note that we define the array rgb once, as a Uint8ClampedArray. You could use a normal array, but Typed Arrays are faster and more memory efficient when all you need to store are values between 0 and 255.
Using Uint8ClampedArray also means that any values greater than 255 or less than 0 are 'clamped'. If you used Uint8Array instead than a value would just have the top bits removed, turning 256 into 0, 257 to 1 and so on.
Then we can make a function which will send this information to the lights - and can call it:
function doLights() {
  getPattern();
  require("neopixel").write(B15, rgb);
}

doLights();
So now, you should have a nice greyscale. But we can animate the lights too:
var pos = 0;
function getPattern() {
  pos++;
  for (var i=0;i<rgb.length;i+=3) {
     var col = (Math.sin(i+pos*0.2)+1) * 127;
     rgb[i  ] = col;
     rgb[i+1] = col;
     rgb[i+2] = col;
  }
}
doLights();
This uses a sine wave to have the lights move between on and off. pos is used to store the position in the animation. Now, every time you call doLights, the lights will change! You can animate this using setInterval!
setInterval(doLights,50);
Now, we can try some other things. For instance, we could use sine waves at different frequencies to display animating rainbow colours:
function getPattern() {
  pos++;
  for (var i=0;i<rgb.length;i+=3) {
     rgb[i  ] = (1 + Math.sin((i+pos)*0.1324)) * 127;
     rgb[i+1] = (1 + Math.sin((i+pos)*0.1654)) * 127;
     rgb[i+2] = (1 + Math.sin((i+pos)*0.1)) * 127;
  }
}
Or we could just use random numbers for a blue twinking effect:
function getPattern() {
  for (var i=0;i<rgb.length;i+=3) {
     rgb[i  ] = 0;
     rgb[i+1] = 0;
     rgb[i+2] = Math.random()*255;
  }
}
Now, we could store all our different getPattern functions in an array, and switch between them when a button is pressed:
var patterns = [];
patterns.push(function() {
  pos++;
  for (var i=0;i<rgb.length;i+=3) {
     var col = (Math.sin(i+pos*0.2)+1) * 127;
     rgb[i  ] = col;
     rgb[i+1] = col;
     rgb[i+2] = col;
  }
});
patterns.push(function() {
  pos++;
  for (var i=0;i<rgb.length;i+=3) {
     rgb[i  ] = (1 + Math.sin((i+pos)*0.1324)) * 127;
     rgb[i+1] = (1 + Math.sin((i+pos)*0.1654)) * 127;
     rgb[i+2] = (1 + Math.sin((i+pos)*0.1)) * 127;
  }
});
patterns.push(function() {
  for (var i=0;i<rgb.length;i+=3) {
     rgb[i  ] = 0;
     rgb[i+1] = 0;
     rgb[i+2] = Math.random()*255;
  }
});

var patternNumber = 0;
function changePattern() {
  patternNumber = (patternNumber+1) % patterns.length;
  getPattern = patterns[patternNumber];
}
setWatch(changePattern, BTN, { repeat: true, edge:'falling' });
So now, if you press the button (not the reset one!) on your Espruino board, the pattern will change. You can also go back and edit getPattern to create the pattern you want:
edit(getPattern);
Now change it, go to the end of the function with the arrow keys (or Page Down) and hit enter. The pattern on the LEDs will change. You can now type the following and your new pattern will be saved into the list of patterns (so you can change to it by pressing the button again):
patterns.push(getPattern)
The full code (if you just want to copy it in all at once) is:
var rgb = new Uint8ClampedArray(25*3);

var pos=0;

var patterns = [];
patterns.push(function() {
  pos++;
  for (var i=0;i<rgb.length;i+=3) {
     var col = (Math.sin(i+pos*0.2)+1) * 127;
     rgb[i  ] = col;
     rgb[i+1] = col;
     rgb[i+2] = col;
  }
});
patterns.push(function() {
  pos++;
  for (var i=0;i<rgb.length;i+=3) {
     rgb[i  ] = (1 + Math.sin((i+pos)*0.1324)) * 127;
     rgb[i+1] = (1 + Math.sin((i+pos)*0.1654)) * 127;
     rgb[i+2] = (1 + Math.sin((i+pos)*0.1)) * 127;
  }
});
patterns.push(function() {
  for (var i=0;i<rgb.length;i+=3) {
     rgb[i  ] = 0;
     rgb[i+1] = 0;
     rgb[i+2] = Math.random()*255;
  }
});
var getPattern = patterns[0];
function doLights() {
  getPattern();
  require("neopixel").write(B15, rgb);
}

var patternNumber = 0;
function changePattern() {
  patternNumber = (patternNumber+1) % patterns.length;
  getPattern = patterns[patternNumber];
}

setWatch(changePattern, BTN, { repeat: true, edge:'falling' });
setInterval(doLights,50);
That's it! If you come up with any good patterns, please Contact Us and let us know!
Check out the WS2811 page for a list of suppliers and types of LED that work in this way.
This page is auto-generated from GitHub. If you see any mistakes or have suggestions, please let us know.