
Graphics Library
Espruino has a built-in graphics library, exposed via the Graphics class.
On most boards (without built in displays) you can create your own instance(s) of the Graphics class using a module that is designed to interface to a display (see 'Graphics Drivers' below), or you can manually create you own using one of the Graphics.createXYZ functions.
On the few boards that do contain LCDs, there is a predefined variable called g (which is an instance of the Graphics Object).
Note: All coordinates in the Graphics library treat 0,0 as the top left corner of the display. However you can rotate or mirror what you draw using the Graphics.setRotation method.
Graphics Drivers
Below are a list of currently available modules that will interface to hardware and create a Graphics object for you:
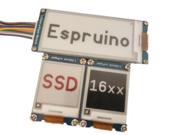 SSD16XX e-Paper display driver
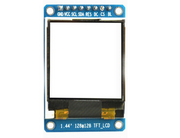 ST7735 LCD controller
 LCD_SPI_UNBUF LCD Library
 ST7789 LCD controller
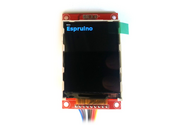 ILI9341 LCD controller
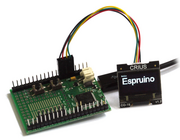 SSD1306 OLED driver
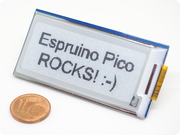 SSD1606 e-Paper display driver
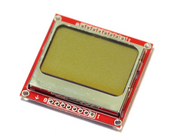 PCD8544 LCD driver (Nokia 5110)
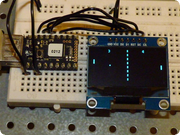 SH1106 OLED driver
 TV Out
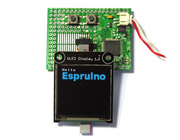 SSD1351 OLED display driver
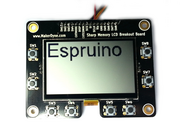 Sharp Memory LCD
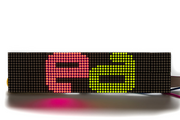 LPD-6416 LED Matrix Display
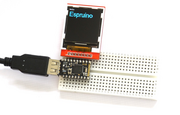 ILI9163 LCD controller
 SSD1327 OLED driver
 ST7565/ST7567 128x64 Monochrome LCD driver
 IS31FL3731 Charlieplexed LED controller
 SH1107 OLED driver
 TM1640 8x8 Matrix LED Shield driver
 Digole LCD driver (monochrome)
 Charlieplexed LED Module
Note: several of the graphics drivers use offscreen buffers. This means that
draw operations won't immediately effect the display, and a method needs calling
to copy the buffer's data onto the screen. By convention this method is usually
called .flip().
Internal (Offscreen) Use
If you don't already have a graphics object set up then you can create a Graphics class which renders to an ArrayBuffer:
Graphics.prototype.print = function() {
  for (var y=0;y<this.getHeight();y++)
    console.log(new Uint8Array(this.buffer,this.getWidth()*y,this.getWidth()).toString());
};
var g = Graphics.createArrayBuffer(8,8,8);
g.setColor(1);
g.drawString("Hi",0,0);
g.print();
// 1,0,1,0,0,1,0,0
// 1,0,1,0,0,0,0,0
// 1,1,1,0,1,1,0,0
// 1,0,1,0,0,1,0,0
// 1,0,1,0,1,1,1,0
// 0,0,0,0,0,0,0,0
// 0,0,0,0,0,0,0,0
// 0,0,0,0,0,0,0,0
See the Graphics.createArrayBuffer
reference for more information on possible arguments that can be used.
Or you can create a Graphics instance which calls your function whenever a pixel needs to be drawn:
var g = Graphics.createCallback(8,8,1,function(x,y,c) {
 print(x+","+y);
});
g.drawLine(0,0,2,2)
//0,0
//1,1
//2,2
Dumping Graphics contents
Espruino can output the contents of a Graphics instance to the Web IDE's REPL
using g.dump().
For example you can just type g.dump() in the REPL to see what
is in the Graphics instance g.
Internally, g.dump() works using
g.asURL() which creates a base64
encoded bitmap of the Graphics instance.
Text / Fonts
Simple Hello World text using a bitmap font:
g.clear();
g.drawString("Hello World",0,0);
The final two arguments are colours (background and foreground)
Or use vector fonts, which are scaleable!
g.clear();
g.setFontVector(40);
g.setColor(1,0,0);
g.drawString("Hello",0,0); // 40px high in red
g.setFontVector(60);
g.setColor(0,1,0);
g.drawString("World",40,40); // 60px high in green
Note: Some non-official Espruino boards don't have vector font support built-in.
You can then switch back to the bitmap font using:
g.setFontBitmap();
You can also use custom Bitmap Fonts. For more information, see Fonts
Circles
In Espruino versions since 1.87, support for drawing circles has been added.
You can draw filled or outlined circles using the two circle functions. For each, the current foreground colour will be used.
The three required arguments are x,y,rad. The x and y coordinates for the centre position of the circle and rad the radius of the circle.
// Draw a circle
g.drawCircle(100,100,50); // A circle with a radius of 50, centred at 100x100

// Draw a filled circle
g.fillCircle(100,100,50); // A filled circle with a radius of 50, centred at 100x100
However if you want to add your own support in earlier versions then you can always do something like this:
g.fillCircle = function(x,y,rad) {
  var pts = parseInt(rad)/2;
  var a = [];
  for (var i=0;i<pts;i++) {
    var t = 2*i*Math.PI/pts;
    a.push(x+Math.sin(t)*rad);
    a.push(y+Math.cos(t)*rad);
  }
  g.fillPoly(a);
}
Random Lines
Randomly draw lines on the screen:
g.clear();
while (true) {
  g.setColor(Math.random(),Math.random(),Math.random());
  g.drawLine(
    Math.random()*g.getWidth(), Math.random()*g.getHeight(),
    Math.random()*g.getWidth(),Math.random()*g.getHeight())
}
Offscreen Graphics
Images / Bitmaps
Espruino has a function called Graphics.drawImage
which can be used to draw images.
Images are either a special kind of object or a String.
Objects
Objects are of the form:
{
  width : int,
  height : int,
  bpp : int (bits per pixel, optional - default 1),
  transparent : int (transparent colour index, optional),
  palette : Uint16Array/string (colour palette),
  buffer : string/arraybuffer (image data)
}
For instance this is a 8x8 pixel, 1 bit smiley face
where any pixel that is 0 is treated as transparent:
var img = {
  width : 8, height : 8, bpp : 1,
  transparent : 0,
  buffer : new Uint8Array([
    0b00000000,
    0b01000100,
    0b00000000,
    0b00010000,
    0b00000000,
    0b10000001,
    0b01111110,
    0b00000000,
  ]).buffer
};
Strings
You can also specify the image as a string or arraybuffer, in the following form:
- For nontransparent:
[width, height, bpp, pixel data...] - For nontransparent with 16 bit palette:
[width, height, bpp|64, col0_lo, col0_hi, col1_lo, col1_hi, ..., pixel data...] - For transparent:
[width, height, bpp|128, transparent col, pixel data...] - For transparent with 16 bit palette:
[width, height, bpp|64|128, transparent col, col0_lo, col0_hi, col1_lo, col1_hi, ..., pixel data...]
Multiple frames
An image can contain multiple frames of the same size (eg for an animation). To do this just ensure that the image bitmap contains all the frames one after the other, then specify
the frame when drawing with Graphics.drawImage: g.drawImage(img, x, y, { frame : n });.
To generate an image like this, the easiest way is to use the Image Converter with the images tiled vertically one after the other, and then change the width. As an example, if you want to store 10, 64x64px images:
- Arrange all images vertically into one bitmap, 64x640px
- Load this into the image converter, choose
Image Objectas the output, and convert - Change the
heightfield in the output from640to64
It is also possible to create an image with frames in an image string, but you would have to modify the height in the image string (second byte):
var tmp = atob("......"); // decode the image
E.toArrayBuffer(tmp)[1]=64; // or whatever you image height is
print(btoa(tmp)); // re-encode as base64
Note: For this to work, each frame of the image must contain a multiple of 8 bits - eg. (width * height * bpp) & 7 == 0.
Creating images
You can:
- Specify images manually (as above)
- Use
Graphics.createImageto specify a 1 bit image in a more compact, readable way:
var img = Graphics.createImage(`

 X   X

   X

X      X
 XXXXXX
`);
Use
Graphics.asImageto create these images from an existing Graphics instance.Upload images to your board's storage (and convert at the same time) with the Web IDE's
Storagebutton.Use our online Image Converter to convert an image into Base64-encoded JavaScript that can be pasted into your code.
Load bitmaps directly (eg. from an SD card) with the BMPLoader module:
var img = require("BMPLoader").load(require('fs').readFileSync("foo.bmp"));
g.drawImage(img, 10, 10);
Beware: Microcontrollers don't have much memory - even a small 128x128 pixel 8 bit image may be too big to fit in Espruino's memory!
Rendering
You can then simply draw images to the screen wherever you want:
g.drawImage(img, 10, 10);
// or draw an image directly from Storage
g.drawImage(require("Storage").read("myimage.img"), 10, 10);
// draw an image twice the size
g.drawImage(img, 10, 10, {scale:2});
// draw a large, rotated image
g.drawImage(img, 10, 10, {scale:1.5, rotate:Math.PI/4});
If you use a single-bit image, the foreground and background colors will be used instead of the image's colors. Otherwise the color data will be copied directly so it's an idea to use a bitmap of the same bit depth as your display.
See the reference for Graphics.drawImage for more information...
Creating an image via command-line
The easiest solution is to use our online Image Converter.
Or you can use command-line tools locally to create a raw image that can be uploaded separately. It's best to install ImageMagick. Then you can type commands like:
# Create a 24 bit RGB image called output.raw
convert myimage.png rgb:output.raw

# Create a 24 bit, 16x16 pixel RGB image called output.raw
convert myimage.png -resize 16x16\! -depth 8 rgb:output.raw

# Create an 8 bit, 16x16 pixel Greyscale image called output.raw
convert myimage.png -resize 16x16\! -depth 8  gray:output.raw

# Create a 1 bit, 16x16 pixel black and white image called output.raw
# Note this one only works if your image is a multiple of 8 pixels wide
convert myimage.png -resize 16x16\! -depth 1  gray:output.raw
On Linux, you can type base64 --wrap=0 myfilename.raw to convert the raw file to base64 - or on other platforms you can use the File Converter webpage.
Once you've got the base64 encoded image, simply decode it with atob and create an ArrayBuffer from it. For instance this is the Espruino logo:
var img = {
  width : 32, height : 32, bpp : 1,
  transparent : 0,
  buffer : E.toArrayBuffer(atob("AAAAAAAAeAAAf/4AH/+bAH/ABQBoAAeAaAADwHQAAf5aAfCfS/8/sUXP//1G//AdQ/wAHUAAAB1AAAAdQAAAHWAAABNgAAAeYAAAEOAAABDgAAAQ8AAAGPgAABz4AAAcfAAAnD4AP/A+B//AHz//wA///4AAP+AAABgAAAAAAAA="))
};
Decoding encoded images
Sometimes you might want to turn an image that's in Espruino format back into a PNG file. The best way to do this is to just use Espruino.
You can just write to the existing Graphics instance and dump the whole thing out to the Web IDE's console (but then you'll have to manually crop it to size):
// the image to decode
let img = atob("GBiBAAAAAAAAAAAAAA//8B//+BgAGBgAGBgAGB//+B//+B//+B/++B/8+B/5+B8z+B+H+B/P+B//+B//+B//+A//8AAAAAAAAAAAAA==")
// draw the image and dump it out
g.clear(1).drawImage(img).dump();
Or you can create a Graphics instance of the correct size and dump that out:
// the image to decode
let img = atob("GBiBAAAAAAAAAAAAAA//8B//+BgAGBgAGBgAGB//+B//+B//+B/++B/8+B/5+B8z+B+H+B/P+B//+B//+B//+A//8AAAAAAAAAAAAA==")
// create a Graphics instance of the correct size
let m = g.imageMetrics(img);
let t = Graphics.createArrayBuffer(m.width,m.height,m.bpp,{msb:true});
// draw to the Graphics instance and dump it to the IDE console
t.drawImage(img).dump();
// you can also use .asBMP/.asURL to get the contents in a variable
Tutorials using Graphics
 Fonts
Fonts
 YouTube View Counter
 Font Converter
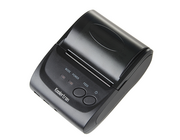 Bluetooth LE Printers
 Graph Library
 Tilt Hydrometer Brew Display with Pixl.js
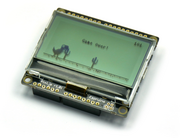 Dinosaur Game
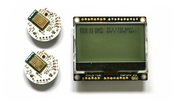 Pixl.js Wireless Temperature Display
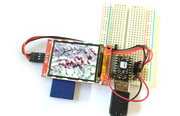 Image Slideshow with ILI9341 display
 Converting Bitmaps for Graphics
 Bangle.js Graphics
 Ethernet Webcam Display
 Rubble Watch
 Pocket 'walking' GPS
 Asteroids Game
 Flappy Bird Game
 Pixl.js Wireless Weather Station
 Freezer Alarm
 Pixl.js Simple Logger
 Pixl.js Pong Game
 Pixl.js Multiplayer Pong Game
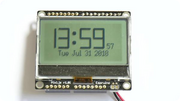 Morphing 7 Segment Clock
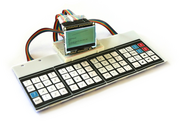 Pixl.js Home Computer
 Wireless Temperature Sensor
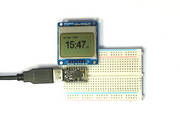 Pico Clock
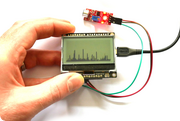 Pixl.js Spectrum Analyser
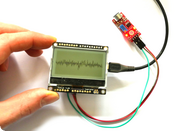 Pixl.js Oscilloscope
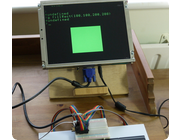 Espruino Home Computer
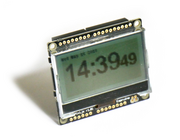 Pixl.js Clock
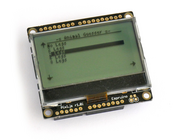 Animal Guessing Game
 Platform Game
 Pixl.js Temperature Display
 Pixl.js Conference Badge - Rotating Cube
 Snake Game
 5 Minute Wire Loop Game
 Pico Weather Station
 Pico LCD Display Hello World
 Pico Electronic Dice
 Controlling Pico from a Computer
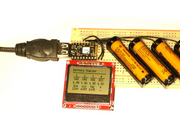 AA/AAA Battery Charger
 VT100 Terminal Emulator
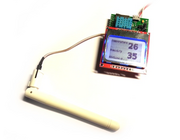 WiFi Xively Humidity/Temperature Sensor with Display
 Graphical Menu
 Bitmap file (BMP) Loader Module
 Temperature Graph on a PCD8544 display, with DS18B20 temperature sensor
 Temperature on a PCD8544 display, with DS18B20 temperature sensor
 Reaction Timer using RGB123
 HTTP Image Loader
This page is auto-generated from GitHub. If you see any mistakes or have suggestions, please let us know.