Writing and Submitting Modules (or changes)
If you've developed some code to interface to a bit of hardware (for instance an LCD or some kind of module)
it'd be great if you could make and submit a JavaScript module (library) that others can use with a command
like require("libname").
- Get a GitHub account
- Visit [https://github.com/espruino/EspruinoDocs] and click 'Fork' in the top-right. You'll now have your own copy of all the documentation in your GitHub account.
- Click on the
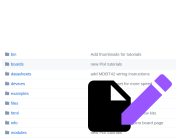
devicesfolder, and at the top where it saysEspruinoDocs / devices / +, click on the+ - Name your module after the device you're using (try and keep this really small and concise, like
PCD8544for the driver chip in the Nokia LCD) and add.jsto the end, for instanceMOD123.js. Copy and paste the following template into the file:
/* Copyright (c) 2014 Your Name. See the file LICENSE for copying permission. */
/*
Quick description of my module...
*/

var C = {
  MY : 0x001,          // description
  PRIVATE : 0x001,     // description
  CONSTANTS : 0x00423  // description
};

function MOD123(pin1,pin2) {
  this.pin1 = pin1;
  this.pin2 = pin2;
}

/** 'public' constants here */
MOD123.prototype.C = {
  MY : 0x013,         // description
  PUBLIC : 0x0541,    // description
  CONSTANTS : 0x023   // description
};

/** Put most of my comments outside the functions... */
MOD123.prototype.foo = function() {
  // you can use C.PRIVATE
  // or this.C.PUBLIC
};

/** Put most of my comments outside the functions... */
MOD123.prototype.bar = function() {
};

/** This is 'exported' so it can be used with `require('MOD123.js').connect(pin1,pin2)` */
exports.connect = function (pin1, pin2) {
  return new MOD123(pin1, pin2);
};
To test out your module, we'd suggest that you copy it verbatim into the right-hand side of the Web IDE, with the line var exports={}; at the top, and at the bottom, where you use the module, write exports.myfunction() instead of require('MOD123').myfunction().
Check out some of the other modules for examples (some of these still don't follow this form though). There are some important points to note here, which will help make your module as efficient as possible.
When a module is loaded, Espruino executes the file in its own scope and then stores the variables and functions that are defined in that scope in a cache of modules.
Any functions and variables defined in the root scope will be common and won't be duplicated if the module is used more than once in someone's code. However if you define a function within another function, for instance inside
exports.myfunctionthen that function will be created again every timeexports.myfunctionis called.When most users use
require(), the Web IDE will load a minified version of their module. This means:Any constants and functions that are not public will be folded if it makes sense - saving space and making the library faster.
All comments will be removed.
Even if users don't use the minified version (maybe they copy the full version to a Micro SD card or reconfigure the Web IDE's defaults):
- Espruino stores the contents of functions verbatim (including comments), but comments outside function declarations won't take up space.
Click
Commit New File. You can always click on the file later and then click 'edit' in the top right if you want to change it.Now we just need to make a small documentation file so that others can find your module. Add another file, this time called
MOD123.md.Copy and paste the following template into the file (note that the first keyword of a module should always be
Module):<!--- Copyright (c) 2014 Your Name. See the file LICENSE for copying permission. --> My Module's proper title ===================== * KEYWORDS: Module,Comma,separated,list,of,search,words A bit about my module. Use the [MOD123](/modules/MOD123.js) ([About Modules](/Modules)) module for it. You can wire this up as follows: | Device Pin | Espruino | | ---------- | -------- | | 1 (GND) | GND | | 2 (VCC) | 3.3 | | 3 (SIGIN) | A0 | | 4 (SIGNOUT)| A1 | How to use my module: ``` var foo = require("MOD123").connect(A0,A1); foo.usingFoo(); ```
To get your module's description formatted nicely you just need to write it in a slightly special way, called Markdown. See this link for examples of how to use it, and maybe look at the other modules in GitHub.
You'll probably also want to add this to the end of the file if your module has more than one function. This will scan the JavaScript file for exported functions and comments of the form /** ... */ - which will then be included as a reference for your module.
  Reference
  ---------

  * APPEND_JSDOC: MOD123.js
You can also add APPEND_USES so that if others Write Tutorials that say USES: MOD123 at the top, they will be listed on your module's page:
  Using
  -----

  * APPEND_USES: MOD123
And that's it! Click
Commit New File.When you have it all as you want, when looking at your GitHub repository's main page click on
Pull Request.Make sure it's showing the right stuff, and then click
Click to create a pull request for this comparisonand enter a short description.Finally click
Send pull requestand you're done! We'll be able to take in your changes and merge them with everything else!
This page is auto-generated from GitHub. If you see any mistakes or have suggestions, please let us know.