Smartibot
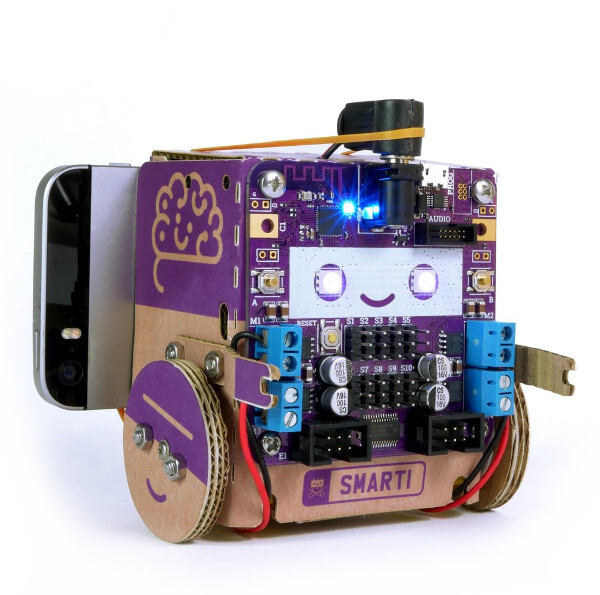
The world’s first Artificial Intelligence enabled cardboard robot that you build yourself.
Smartibot works with your smartphone, meaning you can use your mobile as a remote control, or by attaching it to your robot, as it’s brain.
Firmware binaries can be found in:
- the Download page - either from the list of firmwares, or a downloadable ZIP.
- the binaries folder (current version)
- the automatic Travis Builds (cutting edge builds)
To update your firmware, follow the instructions below
Contents
Using
Smartibot can be used like any other Espruino Bluetooth LE device, with full access to the NRF class for BLE Functionality.
Check out the Getting Started Guide.
Buttons
There are two built-in variables for buttons, BTN1 (Button A) and BTN2 (Button B).
These can be read using BTN1.read() or digitalRead(BTN1) (the two commands
are identical), or you can be notified when a button changes state:
setWatch(function(e) {
  if (e.state) print("Button pressed");
  else print("Button released");
}, BTN1, {repeat:true, edge:"both"});
The code above will call the function when the button is pressed and
when it is released. You can remove edge:"both" completely or use edge:"rising"
to be notified only when the button is pressed, or cal use edge:"falling" to
be notified only when it is released.
NOTE: On the Smartibot build that ships with KickStarter devices,
the value from BTN1.read() is inverted (true when released, false when pressed).
Motors
There are 4 motor outputs which can be controlled using require("Smartibot").setMotor(motor, value).
value is a number between -1 (full reverse) and 1 (full forward).
var smarti = require("Smartibot");

smarti.setMotor(2, 1); // run motor 2 forward at full speed
smarti.setMotor(1, -0.5); // run motor 1 in reverse at half speed
LEDs
There is one blue LED controllable using LED.write(..), however
the left and right 'eyes' must be controlled using the require("Smartibot").setLEDs(left, right) command:
var smarti = require("Smartibot");

// Set left LED to RED, right LED to GREEN
smarti.setLEDs([255,0,0], [0,255,0]);
NOTE: On the Smartibot build that ships with KickStarter devices,
the single blue LED is inverted (true for off, false for on).
Servo outputs
To control servos, use the require("Smartibot").setServo(servo, value).
value is a number between 0 and 100.
var smarti = require("Smartibot");

smarti.setServo(1, 50); // Set servo 1 to midpoint
Display board
Plug the display into E1. Calling g = require("Smartibot-display").connect(smarti.E1)
will return an instance of Graphics which you can then use. It is 16 pixels wide, 9 pixels high, and 8 bits per pixel.
When you need to display something, call g.flip() to send it to the screen:
var smarti = require("Smartibot");
var g = require("Smartibot-display").connect(smarti.E1);

// Clear the screen
g.clear();
g.setColor(127); // set brightness - 0..255
// Draw something!
g.drawRect(0,0,15,8);
g.drawString("Hi",2,2);
// Send what we drew to the screen
g.flip();
Check out Graphics for full details on how to use Graphics and add your own images.
Distance board
Plug the board into E1. Calling require("Smartibot-distance").connect(smarti.E1);
returns an object with the following entries:
dist.getLeft()returns the distance from the left sensor in millimetersdist.getRight()returns the distance from the left sensor in millimetersdist.getGesture()returns"left"/"right"/"up"/"down"is a gesture was found, orundefinedif not.dist.gestureis an instance of APDS9960 for direct access to the gesture sensordist.left/dist.rightare instances of VL53L0X for direct access to the laser sensors
var smarti = require("Smartibot");
var dist = require("Smartibot-distance").connect(smarti.E1);

setInterval(function() {
  // try and avoid obstacles if less than 10cm away
  if (dist.getLeft() < 100) smarti.setMotor(1,0);
  else smarti.setMotor(1,1);
  if (dist.getRight() < 100) smarti.setMotor(2,0);
  else smarti.setMotor(2,1);

  // if a gesture was found, output what it was
  var gesture = dist.getGesture();
  if (gesture) console.log(gesture);
}, 100);
Reference
// Set LEDs - expects two 3-element arrays with each elemnt between 0 and 255 : [R,G,B], [R,G,B]
exports.setLEDs = function (l, r) { ... }

// Set motors 1..4 with a value between -1 and 1
exports.setMotor = function (M, S) { ... }

// Set servos 1..10 with a value 0..100
exports.setServo = function (num, val) { ... }
Tutorials
First, it's best to check out the Getting Started Guide
Tutorials using just Bluetooth LE:
 LEGO WeDo 2.0
") LEGO Power Functions Clone Remote Control (Mould King M-0006 / Kaiyu / Bandra / AKOGD / MayD / etc)
LEGO Power Functions Clone Remote Control (Mould King M-0006 / Kaiyu / Bandra / AKOGD / MayD / etc)
") Quick Start (Bluetooth LE)
Quick Start (Bluetooth LE)
 BTHome Library
 Pixl.js Bluetooth to Ethernet MQTT Bridge
 Bluetooth LE Printers
 Bluetooth LE Emoji Advertising
 Battery Monitor
 Tilt Hydrometer Repeater
 BLE Advertising with Node.js/Python/C#/Android
 Automatic Data Download
 Puck.js to GCP BigQuery & Data Studio
 Stream from Puck.js to AWS IOT Core & SNS Email
") Bluetooth LE UARTs (NUS)
Bluetooth LE UARTs (NUS)
 Bluetooth LE HID Keyboards
 Bluetooth LE Security and Access Control
 Bluetooth LE MIDI
 Web Bluetooth on Linux
 Bluetooth Time Setter
 Using Web Bluetooth with Espruino
 Bluetooth LE and If This Then That
 UART.js Library
 Eddystone Beacons
 Bluetooth LE and Node-RED with MQTT
 Bluetooth Music Controller
 Controlling Bluetooth Lights with Puck.js
 Bluetooth LE HTTP Proxies
 Exercise Machine controlled Video
 BLE Communications
") About Bluetooth LE (BLE)
About Bluetooth LE (BLE)
 Puck.js with SMS control
 Pixl.js SMS Remote Monitoring
 Web IDE on a Raspberry Pi
 Puck.js Bluetooth with the Graphical Editor
 Controlling Other BLE Espruino Devices
 Pixl.js Simple Logger
 Pixl.js Multiplayer Pong Game
 BLE Characteristic Scan
LED BLE Library
Bluefruit LE app interface
BLE Characteristic Scan
LED BLE Library
Bluefruit LE app interface
Tutorials using Bluetooth LE and functionality that may not be part of Smartibot:
 Water Level Monitor
 Puck.js Vibration Sensor
 DIY Smart Meter
 BTHome Door Sensor for Home Assistant
 BTHome and Home Assistant Setup
 Pixl.js Wireless Temperature Display
 Turning an Espruino Puck.js Into a Universal Presentation Clicker
 Interfacing to a PC
 Controlling Espruino from Tensorflow on the Desktop
 Bookmarklets with Web Bluetooth
 Bangle.js Data Streaming
 Puckmote - Universal Remote Control
 IoT for Kitchen Gardens
 Time Machine Retro-Inspired Smartwatch
 Talos, Keeping You Safe During Your Commute
 Bluetooth Energy Usage Monitor
 Electric Skateboard Controller
 Wooden Bluetooth Remote for Lego Duplo Train
 Puck.js Control from Android using DroidScript
 Ikea Eneby Speaker Controller
 Pixl.js Wireless Weather Station
 Temperature Controlled Night Light with Puck.js
 Infrared Record and Playback with Puck.js
 Door Controlled Light with Puck.js
 Freezer Alarm
Firmware Updates
For this you'll need an Android or Apple phone or tablet.
- Power on your Smartibot, while holding down Button A
- Release Button A less than 2 seconds after power on
- Follow the Puck.js instructions for updating firmware using the NRF Connect app on your phone (download the
smartibotfirmware file, not thepuckjsone).
This page is auto-generated from GitHub. If you see any mistakes or have suggestions, please let us know.