BBC micro:bit
The BBC micro:bit is a small microcontroller board designed for computer education in the UK - see the Wikipedia Article for more information.
There are multiple versions of the micro:bit available:
- micro:bit v2 - full-featured support with 2v08 and later (these are the ones with a speaker)
- micro:bit v1.5 - (cut-down Espruino, limited memory) to use the sensors you'll need 2v07 or later
- micro:bit v1 - (cut-down Espruino, limited memory) supported from Espruino 1v95
We are currently not using universal hex files, so you will need to load the
correct hex file (_microbit1 or _microbit2) for your board.
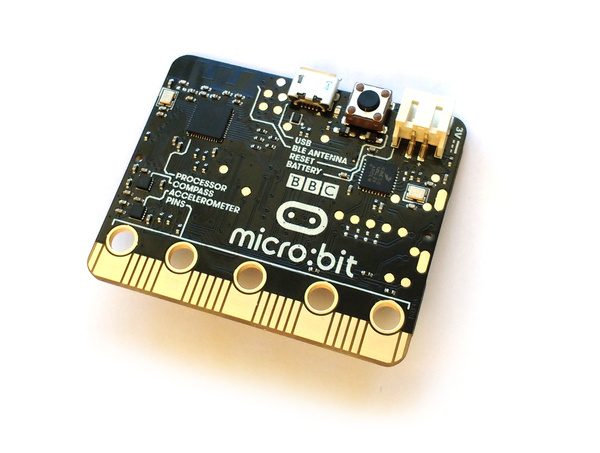
micro:bit contains:
- USB communications and JST power connectors
- A 5x5 array of LEDs for use as a display
- Two user-configurable buttons, and one reset button
- An accelerometer and magnetometer (LSM303AGR, or MAG3110 + MMA8652 on older boards)
- Speaker & Microphone on v2
- A Nordic nRF52833 ARM Cortex-M4 microcontroller (512kB flash, 128kB RAM) on v2, or nRF51822 ARM Cortex-M0 microcontroller (256kB flash, 16kB RAM) on v1.
- A Freescale Kinetis chip to handle USB - this provides a virtual USB flash drive that allows firmware updates just by saving a file.
Contents
micro:bit v1
While we do provide Espruino for the micro:bit v1, it takes a lot of memory to provide Bluetooth functionality and as a result some functionality has had to be removed compared to the v2 and other Espruino devices:
- No ES6 Features (ArrayBuffer map/forEach, template literals, arrow functions, etc)
- No debug or code autocomplete
- No advanced library functions (In the reference, any function with the comment "Note: This is only available in some devices: not devices with low flash memory" will not be included)
- Low program memory (Espruino on micro:bit has only 350 vars available, whereas on other devices it has over 10 times that)
If you want the full experience, please consider buying an official Espruino Board.
Flashing Espruino
There is a build of Espruino designed specifically for the micro:bit. Releases are available from the Download page for micro:bit 1 or micro:bit 2 - however you may also download 'cutting edge' builds from here - these are updated every time something changes in Espruino's source code, so may occasionally not work.
To flash onto your micro:bit:
- Plug it into USB. A drive called
MICROBITshould appear - Download the microbit
.hexfile for Espruino (ensuring that you have themicrobit1ormicrobit2file depending on your device), and save it directly into the root of that drive - The yellow LED on the micro:bit will blink quickly for a few seconds, and will then stop.
- The Espruino firmware is now installed!
Using the micro:bit
There are two ways to communicate with your micro:bit:
USB
This is the easiest, and recommended way of communicating with Espruino.
For Windows users, you will need to install drivers first - on other platforms, the board should 'just work'.
Follow the instructions in the Quick Start tutorial to install the Web IDE (ignore the Plugging in section), and you should be able to communicate with the micro:bit just like any other board.
Note: as the micro:bit has a display but no general-purpose LEDs, the tutorials in the Quick Start that use LED1/etc will not work without modification.
Bluetooth Low Energy (BT 4.0 / Bluetooth Smart)
You can also program the micro:bit wirelessly!
If you have a device that supports Web Bluetooth, you can go directly to the Online Web IDE in your web browser, and can connect with that.
- Click the connect icon at the top left
- Choose
Web Bluetooth- if this doesn't exist, it's because your device doesn't have Web Bluetooth enabled. Click thestatuslink for more information. - Now you should be prompted for a device to connect to by the web browser
- Click it, and wait - connection can take around 10 seconds
- Finally the icon up the top left should change state to 'Connected', and you'll be able to program Espruino as normal - but via Bluetooth!
micro:bit Functionality
The micro:bit has a few variables and functions that are useful:
BTN1 and BTN2
These read the state of the two buttons, for example:
BTN1.read() or digitalRead(BTN1) return 1 or 0 depending on the state of the button
The following will write Pressed each time the button is pressed:
setWatch(function() {
  console.log("Pressed");
}, BTN1, {repeat:true, debounce:20, edge:"falling"});
Or this will write Pressed or Released:
setWatch(function(e) {
  if (e.state) console.log("Released");
  else console.log("Pressed");
}, BTN1, {repeat:true, debounce:20, edge:"both"});
Note: Currently the state of the buttons is inverted - 1 means not pressed, 0 means pressed.
show(bitmap)
Shows graphics on the built-in 5x5 LED screen. This takes a binary number or a string. For example:
show(0)shows nothingshow(1)lights the first LEDshow(0b1000)lights the fourth LEDshow(0b1111111111111111111111111)orshow(0x1FFFFFF)lights all LEDs- The following will draw a smiley face:
show("1   1\n"+
     "  1  \n"+
     "  1  \n"+
     "1   1\n"+
     " 111 \n");
`
You can use the Graphics library to display text and images, for example the following with scroll 'Espruino' across the display:
g = Graphics.createArrayBuffer(5,5,1,{msb:false});
g.flip = function(){show(this.buffer);};

var x = 0;
setInterval(function() {
  x++;
  if (x>50)x=0;
  g.clear();
  g.drawString("Espruino",5-x);
  g.flip();
}, 100);
Microbit class
This contains functions for interfacing with the Micro:bit hardware. See a full reference here
Note: In 2v07 and earlier the Microbit class doesn't exist and instead there are just acceleration() and compass() functions.
Microbit.accel()
This returns an object with x, y, and z elements, each containing the force in that axis in g.
Note: In 2v07 and earlier this doesn't exist and acceleration() is available instead.
You can also use Microbit.accelOn() which then creates an event whenever data is available, which can be read with Microbit.on('accel', function(d) { ... })
Microbit.mag()
This returns an object with x, y, and z elements, indicating the current direction of the magnetic field
Note: In 2v07 and earlier this doesn't exist and compass() is available instead.
Microbit.play(waveform, samplesPerSecond, callback)
Micro:bit version 2 only: plays a sound - see the reference for more information
Microbit.record(samplesPerSecond, callback, samples)
Micro:bit version 2 only: records a sound - see the reference](http://www.espruino.com/Reference#l_Microbit_record) for more information
Pinout
Hover the mouse over a pin function for more information. Clicking in a function will tell you how to use it in Espruino.
- Purple boxes show pins that are used for other functionality on the board. You should avoid using these unless you know that the marked device is not used.
- ! boxes contain extra information about the pin. Hover your mouse over them to see it.
- 3.3v boxes mark pins that are not 5v tolerant (they only take inputs from 0 - 3.3v, not 0 - 5v).
- 3.3 is a 3.3v output from the on-board Voltage regulator.
- GND is ground (0v).
- ADC is an Analog to Digital Converter (for reading analog voltages)
- SPI is the 3 wire Serial Peripheral Interface.
- USART is a 2 wire peripheral for Serial Data.
- I2C is the 2 wire Inter-Integrated Circuit bus.
Tutorials
Tutorials using the micro:bit Board:


Tutorials using Bluetooth LE:
 Battery Monitor
 BTHome Library
 Bluetooth Characteristic Notifications
 LEGO WeDo 2.0
") LEGO Power Functions Clone Remote Control (Mould King M-0006 / Kaiyu / Bandra / AKOGD / MayD / etc)
LEGO Power Functions Clone Remote Control (Mould King M-0006 / Kaiyu / Bandra / AKOGD / MayD / etc)
") Quick Start (Bluetooth LE)
Quick Start (Bluetooth LE)
 Pixl.js Bluetooth to Ethernet MQTT Bridge
 Bluetooth LE Printers
 Bluetooth LE Emoji Advertising
 Tilt Hydrometer Repeater
 BLE Advertising with Node.js/Python/C#/Android
 Automatic Data Download
 Puck.js to GCP BigQuery & Data Studio
 Stream from Puck.js to AWS IOT Core & SNS Email
") Bluetooth LE UARTs (NUS)
Bluetooth LE UARTs (NUS)
 Bluetooth LE HID Keyboards
 Bluetooth LE Security and Access Control
 Bluetooth LE MIDI
 Web Bluetooth on Linux
 Bluetooth Time Setter
 Using Web Bluetooth with Espruino
 Bluetooth LE and If This Then That
 UART.js Library
 Eddystone Beacons
 Bluetooth LE and Node-RED with MQTT
 Bluetooth Music Controller
 Controlling Bluetooth Lights with Puck.js
 Bluetooth LE HTTP Proxies
 Exercise Machine controlled Video
 BLE Communications
") About Bluetooth LE (BLE)
About Bluetooth LE (BLE)
 Puck.js with SMS control
 Pixl.js SMS Remote Monitoring
 Web IDE on a Raspberry Pi
 Puck.js Bluetooth with the Graphical Editor
 Controlling Other BLE Espruino Devices
 Pixl.js Simple Logger
 Pixl.js Multiplayer Pong Game
 BLE Characteristic Scan
LED BLE Library
Bluefruit LE app interface
BLE Characteristic Scan
LED BLE Library
Bluefruit LE app interface
Tutorials using Bluetooth LE and functionality that may not be part of the micro:bit:
 DIY Smart Meter
 BTHome and Home Assistant Setup
 BTHome Door Sensor for Home Assistant
 Water Level Monitor
 Puck.js Vibration Sensor
 Interfacing to a PC
 Pixl.js Wireless Temperature Display
 Turning an Espruino Puck.js Into a Universal Presentation Clicker
 Controlling Espruino from Tensorflow on the Desktop
 Bookmarklets with Web Bluetooth
 Bangle.js Data Streaming
 Puckmote - Universal Remote Control
 IoT for Kitchen Gardens
 Time Machine Retro-Inspired Smartwatch
 Talos, Keeping You Safe During Your Commute
 Bluetooth Energy Usage Monitor
 Electric Skateboard Controller
 Wooden Bluetooth Remote for Lego Duplo Train
 Puck.js Control from Android using DroidScript
 Ikea Eneby Speaker Controller
 Pixl.js Wireless Weather Station
 Temperature Controlled Night Light with Puck.js
 Infrared Record and Playback with Puck.js
 Door Controlled Light with Puck.js
 Freezer Alarm
Buying
micro:bits are currently available to buy all over the world.
Official Espruino Boards


This page is auto-generated from GitHub. If you see any mistakes or have suggestions, please let us know.