Nordic Thingy:52
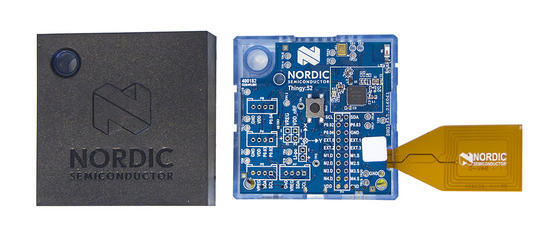
The Nordic Thingy:52 is a compact, power-optimized, multi-sensor development kit. It is an easy-to-use development platform, designed to help you build IoT prototypes and demos, without the need to build hardware or write firmware.
NOTE: Espruino for Thingy:52 is no longer officially supported. The last available build is 2v06
Contents
Features
- 6x6 cm plastic and rubber case
- Environment Sensors (temp, humidity, pressure, air quality color and light)
- 9-axis motion sensing (accelerometer, gyroscope and compass)
- Speaker for playing pre-stored samples or tones
- Microphone
- Configurable RGB LED and button.
- Long battery life with Li-ion battery and charging via USB.
It contains the following sensors:
For full technical docs, see Nordic's Thingy:52 reference pages - particularly the Hardware description
Buying
Nordic has a list of distributors on their website.
Getting Started
Note: Nordic Thingy devices do not have Espruino pre-installed. You'll have to update the firmware yourself.
Over the air firmware updates
This can be done with any iPhone or Android phone/tablet from the last few years, but will take a few minutes.
Note: After following these instructions your Thingy will only be able to run Espruino unless you buy a nRF52 DK and use that to write the original Thingy:52 firmware back (see the second option for updating firmware).
If you haven't installed Espruino on the Thingy before:
If you haven't installed Espruino before, you need to change the SoftDevice on your Thingy.
- Install the
nRF Toolboxapp on your device - Go to http://www.espruino.com/binaries and download
espruino_*_thingy52_softdevice.zipandespruino_*_thingy52_app.zipto your device. - Pull off the Thingy:52 case
- Turn the Thingy:52 off if it was on (using the sliding switch)
- Hold down the silver button on the top of the Thingy while turning the power on. The LED should quickly start pulsing Yellow, showing the Thingy is in bootloader mode.
- Open the
nRF Toolboxapp - Tap the
DFUicon - Tap
Select File, chooseDistribution Packet (ZIP), and choose theespruino_*_thingy52_softdevice.zipZIP file you downloaded - If choosing the ZIP file opens the ZIP and displays files inside (it can do on some Android 7 devices) then hit back, long-press on the ZIP, and choose
Openin the top right. - If a
Select scopewindow appears, chooseAll - Tap
Select Deviceand choose the device calledThingyDfu - Now tap
Uploadand wait. The update will take around 90 seconds to complete
Now, you need to follow the next set of instructions:
If you have installed Espruino on the Thingy before:
- Turn the Thingy:52 off if it was on (using the sliding switch)
- Hold down the silver button on the top of the Thingy while turning the power on. The LED should quickly start pulsing Yellow, showing the Thingy is in bootloader mode.
- Open the
nRF Toolboxapp - Tap the
DFUicon - Tap
Select File, chooseDistribution Packet (ZIP), and choose theespruino_*_thingy52_app.zipZIP file you downloaded - If choosing the ZIP file opens the ZIP and displays files inside (it can do on some Android 7 devices) then hit back, long-press on the ZIP, and choose
Openin the top right. - If a
Select scopewindow appears, chooseAll - Tap
Select Deviceand choose the device calledThingyDfu - Now tap
Uploadand wait. The update will take around 90 seconds to complete - Turn the Thingy off and back on
- If the Red LED doesn't blink once when you turn the Thingy back on, you need to force it to delete any saved information. Turn it off, then turn it on and then press the button as soon after as you can. This may take a few attempts as pressing too soon will cause the Thingy to enter bootloader mode (pulsing yellow).
You now have Espruino installed!
Updates with the nRF52 DK
This has the advantage of allowing you to use 'cutting edge' Espruino builds, and is much faster. However you will need a Nordic nRF52 DK and a 2x5 pin 0.05" ribbon cable to program your device.
- Pull off the Thingy:52 case
- Attach the ribbon cable to the Thingy and to the
Debug Outport on the nRF52 DK - Plug the nRF52 DK in and turn the Thingy:52 on
- Go to http://www.espruino.com/binaries (or http://www.espruino.com/binaries/travis/master/
for the absolute latest builds) and download the latest file named
espruino_*_thingy52.hex - Save it to the
JLINKdrive that should have appeared on your computer and wait for the LEDs on the nRF52 DK to stop flashing - The red LED on the Thingy should flash to show Espruino has started. If it doesn't, power the Thingy off and back on.
And you're ready to go! Follow the Getting Started Guide for details on getting the IDE connected wirelessly.
On-board peripherals
On-board peripherals are exposed via the Thingy library:
// Button
BTN

// R/G/B leds
LED1/2/3

// Pins P0.02/P0.03/P0.04 on the Thingy PCB
// correspond to D2/D3/D4 and are analog capable
// GPIO.
D2/D3/D4

// MOSFET outputs. To use these, connect all the Mx.S  pins to GND
// And then Mx.D pins will be pulled low when MOSx is high.
MOS1/2/3/4

// External IO outputs
IOEXT0/1/2/3

// Get repeated callbacks with {x,y,z}. Call with no argument to disable
Thingy.onAcceleration = function(callback) { ... }

// Get one callback with a new {x,y,z} acceleration value
Thingy.getAcceleration = function(callback) { ... }

// Get repeated callbacks with {accel,gyro,mag} from the MPU at 10Hz. Call with no argument to disable
Thingy.onMPU = function(callback) { ... }

// Get one callback with a {accel,gyro,mag} value from the MPU
Thingy.getMPU = function(callback) { ... }

// Get repeated callbacks with {pressure,temperature}. Call with no argument to disable
Thingy.onPressure = function(callback) { ... }

// Get one callback with a new {pressure,temperature} value
Thingy.getPressure = function(callback) { ... }

// Get repeated callbacks with {humidity,temperature}. Call with no argument to disable
Thingy.onHumidity = function(callback) { ... }

// Get one callback with a new {humidity,temperature} value
Thingy.getHumidity = function(callback) { ... }

// Get repeated callbacks with air quality `{eCO2,TVOC}`. Call with no argument to disable
Thingy.onGas = function(callback) { ... }

//Get one callback with a new air quality value `{eCO2,TVOC}`. This may not be useful as the sensor takes a while to warm up and produce useful values
Thingy.getGas = function(callback) { ... }

// Get repeated callbacks with color `{r,g,b,c}`. Call with no argument to disable
Thingy.onColor = function(callback) { ... }

// Get one callback with a new color value `{r,g,b,c}`
Thingy.getColor = function(callback) { ... }

// Returns the state of the battery (immediately, or via callback) as { charging : bool, voltage : number }
Thingy.getBattery = function(callback) { ... }

// Make a simple beep noise. frequency in Hz, length in milliseconds. Both are optional.
Thingy.beep = function(freq, length) { ... }

// Play a sound, supply a string/uint8array/arraybuffer, samples per second, and a callback to use when done
// This can play up to 3 sounds at a time (assuming ~4000 samples per second)
Thingy.sound = function(waveform, pitch, callback) { ... }

// Record audio for the given number of samples, at 8192 Hz 8 bit.
// This can then be fed into Thingy.sound(waveform, 8192). RAM is scarce, so realistically 1 sec is a maximum.
Thingy.record = function(samples, callback)  { ... }
You can also enable the graphical editor blocks for Thingy:52 in the Web IDE
by clicking Settings -> General -> Graphical Editor Extensions-> Nordic Thingy:52
Tutorials
First, it's best to check out the Getting Started Guide
Tutorials using Thingy:52:
")
")

Tutorials using Bluetooth LE:
 Battery Monitor
 BTHome Library
 Bluetooth Characteristic Notifications
 LEGO WeDo 2.0
") LEGO Power Functions Clone Remote Control (Mould King M-0006 / Kaiyu / Bandra / AKOGD / MayD / etc)
LEGO Power Functions Clone Remote Control (Mould King M-0006 / Kaiyu / Bandra / AKOGD / MayD / etc)
 Pixl.js Bluetooth to Ethernet MQTT Bridge
 Bluetooth LE Printers
 Bluetooth LE Emoji Advertising
 Tilt Hydrometer Repeater
 BLE Advertising with Node.js/Python/C#/Android
 Automatic Data Download
 Puck.js to GCP BigQuery & Data Studio
 Stream from Puck.js to AWS IOT Core & SNS Email
") Bluetooth LE UARTs (NUS)
Bluetooth LE UARTs (NUS)
 Bluetooth LE HID Keyboards
 Bluetooth LE Security and Access Control
 Bluetooth LE MIDI
 Web Bluetooth on Linux
 Bluetooth Time Setter
 Using Web Bluetooth with Espruino
 Bluetooth LE and If This Then That
 UART.js Library
 Eddystone Beacons
 Bluetooth LE and Node-RED with MQTT
 Bluetooth Music Controller
 Controlling Bluetooth Lights with Puck.js
 Bluetooth LE HTTP Proxies
 Exercise Machine controlled Video
 BLE Communications
") About Bluetooth LE (BLE)
About Bluetooth LE (BLE)
 Puck.js with SMS control
 Pixl.js SMS Remote Monitoring
 Web IDE on a Raspberry Pi
 Puck.js Bluetooth with the Graphical Editor
 Controlling Other BLE Espruino Devices
 Pixl.js Simple Logger
 Pixl.js Multiplayer Pong Game
 BLE Characteristic Scan
LED BLE Library
Bluefruit LE app interface
BLE Characteristic Scan
LED BLE Library
Bluefruit LE app interface
Tutorials using Bluetooth LE and functionality that may not be part of Thingy:52:
 DIY Smart Meter
 BTHome and Home Assistant Setup
 BTHome Door Sensor for Home Assistant
 Water Level Monitor
 Puck.js Vibration Sensor
 Interfacing to a PC
 Pixl.js Wireless Temperature Display
 Turning an Espruino Puck.js Into a Universal Presentation Clicker
 Controlling Espruino from Tensorflow on the Desktop
 Bookmarklets with Web Bluetooth
 Bangle.js Data Streaming
 Puckmote - Universal Remote Control
 IoT for Kitchen Gardens
 Time Machine Retro-Inspired Smartwatch
 Talos, Keeping You Safe During Your Commute
 Bluetooth Energy Usage Monitor
 Electric Skateboard Controller
 Wooden Bluetooth Remote for Lego Duplo Train
 Puck.js Control from Android using DroidScript
 Ikea Eneby Speaker Controller
 Temperature Controlled Night Light with Puck.js
 Infrared Record and Playback with Puck.js
 Door Controlled Light with Puck.js
 Freezer Alarm
Information
Serial Console
When power is first applied, the Thingy checks if pin D3 is at 3.3v (which will be the
case if it is connected to a Serial port's transmit line). If it is, it initialises
the on-chip UART on D3 / P0.03 (Thingy RX) and D2 / P0.02 (Thingy TX) and puts the Espruino
console (REPL) on it at 9600 baud.
To use it, connect to a 3.3v output USB to TTL converter as follows:
| Thingy | USB->TTL converter |
|---|---|
| GND | GND |
| D2 / P0.02 | RX ( -> PC ) |
| D3 / P0.03 | TX ( <- PC ) |
| 3V | 3.3v (Optional - to run without a battery) |
You can now use the normal Espruino Web IDE, or a serial terminal application at 9600 baud.
When you connect via Bluetooth, the console will automatically move over. To
stop this, execute Serial1.setConsole(true) to force the console to stay on
Serial1.
Note: Serial1 is not enabled by default because it requires the high speed oscillator to stay on, which increases power draw a huge amount. If you connect the UART but don't power down and power on the Thingy, you won't get a serial port.
Firmware Updates
As of writing, the Thingy:52 bootloader is signed with a private key, so
you need to write firmware using an nRF52 DK board. See the Getting Started
guide above.
This page is auto-generated from GitHub. If you see any mistakes or have suggestions, please let us know.