Bangle.js 2
Bangle.js is the successor to Bangle.js, and is based on the SMA Q3.
Buy Now
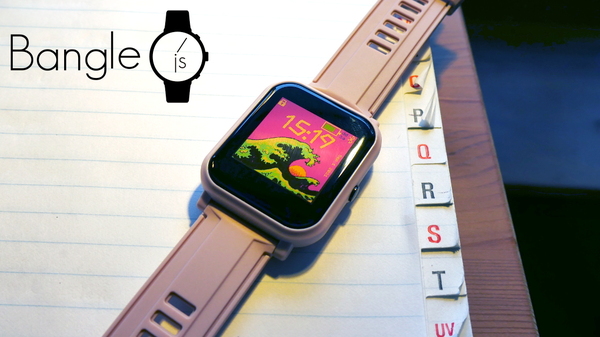
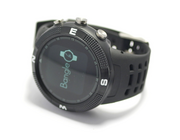
Bangle.js 2 is an open, hackable smartwatch
You can easily install new apps from the web or develop your own using JavaScript or a graphical programming language (Blockly). All you need is a Web Browser (Chrome, Edge or Opera) and you can upload apps or write code to run on your watch wirelessly! Bangle.js is water resistant, AI enabled, and comes with Bluetooth Low Energy, GPS, a heart rate monitor, accelerometer and more.
Contents
- Features
- Quick Usage Notes
- Contact Corrosion / Skin Irritation
- Charging
- Apps
- Powering off
- Resetting
- Recovery menu
- Resetting without loading any code
- Deleting all code
- Deleting apps
- Tutorials
- Information
- Power Consumption
- LCD Screen
- Screenshots
- On-device Peripherals
- Hardware SWD
- Firmware Updates
- Troubleshooting
- Other Official Espruino Boards
Features
- IP67 Water Resistant (everyday use, not swimming or baths)
- Nordic 64MHz nRF52840 ARM Cortex-M4 processor with Bluetooth LE
- 256kB RAM 1024kB on-chip flash, 8MB external flash (GD25Q64C/E)
- 1.3 inch 176x176 always-on 3 bit colour LCD display (LPM013M126)
- Full touchscreen (Hynitron CST816D)
- Single button on side of watch
- GPS/Glonass receiver (AT6558 / AT6558R)
- Heart rate monitor (Vcare VC31 / VC31B)
- 3 Axis Accelerometer (Kionix KX022)
- 3 Axis Magnetometer
- Air Pressure/Temperature sensor (Bosch BMP280 / Goertek SPL06)
- Vibration motor
- 175mAh battery, 4 weeks standby time
- 36mm x 43mm x 12mm watch body, with standard 20mm watch straps
Quick Usage Notes
Check out the Bangle.js 2 Getting Started Guide
There are a few things to know that'll help you get started quickly:
- Long-pressing the button (~2 seconds) will take you back to the default clock app
- When the lock symbol is displayed in the top left hand corner, the touchscreen is not active. Unlocking can be configured in several ways via the settings app, but by default pressing the button will unlock the Bangle and allow you to use the touchscreen.
- In the default App Launcher (which you get to by pressing the button while on the clock), drag the screen to scroll through apps, and tap the icon you want to launch
- In text menus, drag up/down to scroll and tap to select
- In numeric menus, drag up/down to change the number and tap to accept
This video shows you how to get started using the menu and App Loader:
Please check out The Bangle.js Wiki for more hints and common questions.
Contact Corrosion / Skin Irritation
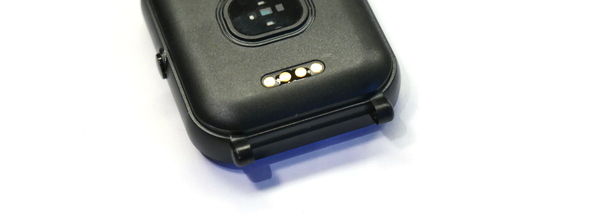
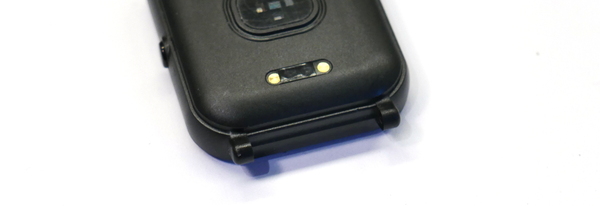
Bangle.js 2 has 4 contacts on the rear. The two on the ends are used for charging and are not powered, however the middle two are SWD debug/programming pins connected straight to the CPU. One has a weak resistor connecting it to 3.3v. At most, 0.0001A of current at 3.3v can be provided, however if exposed to salty water (eg sweat) or other conductive conditions, the contacts will corrode and it is possible that in extreme cases there could be some skin irritation.
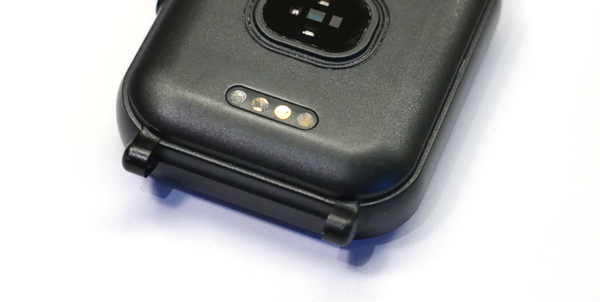
Bangle.js 2 devices sold since the KickStarter campaign ship with a small piece of tape covering the contacts to prevent any problems. If you have a watch without this tape we would strongly advise you apply some paint, tape, a sticker or laquer over the middle two contacts as shown in the images below:
Charging
The supplied charge cable connects to a USB port to charge Bangle.js (despite there being 4 wires, those are for SWD programming and there is no USB data connection).
Do not force the cable on to your Bangle.js If the cable does not pull itself on to the Bangle it's probably the wrong way around. Forcing it to make contact in this case could damage your Bangle.
The cable is magnetic and the wires are connected to USB power. While the cable in Bangle.js 2 does have short circuit protection, please do not leave your cable plugged in or it might attract itself to the nearest magnetic (probably conductive) object and short out.
DO NOT CONNECT A BANGLE.JS 1 CHARGE CABLE TO BANGLE.JS 2 - there are a different number of pins and connecting it could cause damage to your device.
We'll be selling new/replacement Bangle.js charge cables on shop.espruino.com soon, however until then (or if you need a cable next day) you can use:
Apps
Apps are provided by the same Bangle.js app loader as for Bangle.js 1,
you just need to select Bangle.js 2 when prompted (or from the drop-down in the top left).
For iPhone users, web bluetooth is not supported by default with Safari. You will need a browser that has support for web bluetooth such as WebBLE. If your Bangle is paired for notifications, you will need to disconnect from the device for it to show up when you press the "Connect" button. This is due to an issue with the WebBLE browser, and there is an open issue for it.
Powering off
- Enter the launcher by pressing the button to unlock, then pressing it again to enter the launcher (while showing a clock)
- Tap on
Settings - Select item
Utilities - Scroll down to
Turn offand tap again
Resetting
- Long-press the button for about 6 seconds until the screen displays some pixellated text on the top line
- Release the button
- Bangle.js will boot as if it just turned on normally
If you release the button too late you'll enter bootloader mode, in which case you need to wait for 30 seconds for the watch to automatically exit.
Recovery menu
On 2v19 firmware and later, if something has gone wrong you can enter a Recovery menu:
- Hold the button down. After around 6 seconds the screen goes blank and displays some pixellated text
- Keep pressing the button while
====goes across the screen - Keep holding the button while Bangle.js boots
- You'll now get to a
Recoverymenu and you can release the button. At this point the watch's Bluetooth will be enabled and you can connect with the App Loader or IDE if you need to. You can even do a Backup from the App Loader if you need to. There are a few options:Clean Boot- Start up Bangle.js without running any of the code on the watchReboot- reboot the watchTurn off- turn off the watchTest- run a test script. Long-press to exit.Factory Reset- wipe all data and settings from the watch and return it to the state that it came from the factoryExit- exit the menu and boot normallyAttempt Compact- try compacting storage to free space - this may take a few minutesRewrite Bootloader- if the bootloader got corrupted (any settings you made on the watch are not taking effect) then re-writing it can help
Resetting without loading any code
If you uploaded some code that runs at startup and breaks Bangle.js you may need to do this.
2v19 firmware (and newer)
Start the Recovery menu (see above) by holding the button at boot time, then choose Clean Boot
pre-2v19 firmware
It won’t delete anything, so unless you fix/remove the broken code (see "Deleting all Code") Bangle.js will remain broken next time it restarts.
- Hold the button down. After around 6 seconds the screen goes blank and displays some pixellated text
- Keep pressing the button while
====goes across the screen - Keep holding the button while Bangle.js boots
- You should now have the Bangle.js logo, version, and MAC address on screen, and you can release the button
Deleting all code
You can do this either while your watch is in its normal state, or if you have reset it without loading any code (above).
2v19 firmware (and newer)
Start the Recovery menu (see above) by holding the button at boot time, then choose Factory Reset
pre-2v19 firmware
Either
- Go to https://banglejs.com/apps
- Click
More... -> Install default apps
This will erase everything and install just the default apps.
Or
- Go to https://banglejs.com/apps
- Go to
More... -> Remove All Apps - Re-install
Bootloaderand aClockfromLibrary(this is all you need, but other apps are usually installed by default too)
Deleting apps
- You can go to https://banglejs.com/apps and click
Connect. UnderMy Appsyour installed apps are listed, and you can click the 'Bin' icon next to them to remove them - If you can access the menus on your device and the
App Managerapp is installed, you can delete apps using theApp Manager - If you hit any issues with installed apps and can't access the menus on your device, then follow the instructions above for "Resetting without loading any code" above.
Tutorials
In general, most tutorials related to Bangle.js 1 should work on Bangle.js 2,
as long as you're aware that you only have one button and the screen resolution
is different - see below under Information.
Upon release, specific Bangle.js 2 tutorials will be added here.
- For general help with Bangle.js, see the Bangle.js Getting Started Guide
- To get your computer connected, check out the Espruino Getting Started Guide
- To get started with development see the Bangle.js Development page
- There is more technical information below about using the LCD and onboard peripherals
- For information about the internals and pinout, the Bangle.js 2 technical information page
Tutorials using Bangle.js:
 Bangle.js Development
 Bangle.js Getting Started
 Bangle.js Layout library
 Gadgetbridge for Android
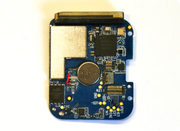 Bangle.js 2 Technical Information
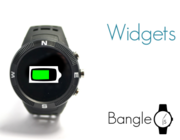 Bangle.js Widgets
 Water Level Monitor
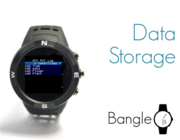 Bangle.js Data Storage (using interface.html)
 Adding an app to the Bangle.js App Loader
 Bangle.js Performance Optimisation
 Bangle.js Fast Loading
 Stopping Bangle.js Reset by Button
 Bangle.js Internationalisation
 Bangle.js Clock Faces
 Bangle.js Technical Information
 Testing Espruino on Bangle.js 2
 Bangle.js First Application (Timer)
 Bangle.js Clock Info
 BTHome and Home Assistant Setup
 Adding a Bangle.js App Settings Page
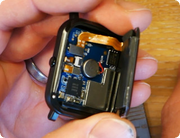 Bangle.js 2 Disassembly
 Bangle.js App Customiser
 Bangle.js Hideable Widgets
 Controlling Espruino from Tensorflow on the Desktop
 Bookmarklets with Web Bluetooth
 Adding a Custom Boot Screen
 Bangle.js Data Streaming
 Bangle.js and Edge Impulse for Machine Learning
 Bangle.js Code Guidelines
 Bangle.js Software Modification
 Bangle.js App Loader Customisation
 Bangle.js Clock Face Fonts
 Pixl.js and Bangle.js Menus
 Bangle.js Graphics
 Bangle.js Strap Modifications
 Bangle.js Disassembly
 Puck.js Control from Android using DroidScript
Tutorials using Bluetooth LE:
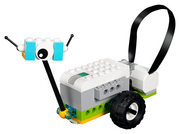 LEGO WeDo 2.0
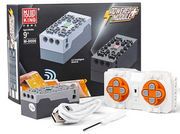 LEGO Power Functions Clone Remote Control (Mould King M-0006 / Kaiyu / Bandra / AKOGD / MayD / etc)
 Quick Start (Bluetooth LE)
 BTHome Library
 Pixl.js Bluetooth to Ethernet MQTT Bridge
 Bluetooth LE Printers
 Bluetooth LE Emoji Advertising
 Battery Monitor
 Tilt Hydrometer Repeater
 BLE Advertising with Node.js/Python/C#/Android
 Automatic Data Download
 Puck.js to GCP BigQuery & Data Studio
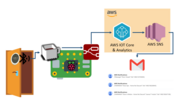 Stream from Puck.js to AWS IOT Core & SNS Email
 Bluetooth LE UARTs (NUS)
 Bluetooth LE HID Keyboards
 Bluetooth LE Security and Access Control
 Bluetooth LE MIDI
 Web Bluetooth on Linux
 Bluetooth Time Setter
 Using Web Bluetooth with Espruino
 Bluetooth LE and If This Then That
 UART.js Library
 Eddystone Beacons
 Bluetooth LE and Node-RED with MQTT
 Bluetooth Music Controller
 Controlling Bluetooth Lights with Puck.js
 Bluetooth LE HTTP Proxies
 Exercise Machine controlled Video
 BLE Communications
 About Bluetooth LE (BLE)
 Puck.js with SMS control
 Pixl.js SMS Remote Monitoring
 Web IDE on a Raspberry Pi
 Puck.js Bluetooth with the Graphical Editor
 Controlling Other BLE Espruino Devices
 Pixl.js Simple Logger
 Pixl.js Multiplayer Pong Game
 BLE Characteristic Scan
 LED BLE Library
 Bluefruit LE app interface
Tutorials using Bluetooth LE and functionality that may not be part of Bangle.js:
 Puck.js Vibration Sensor
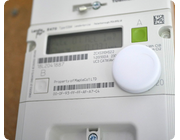 DIY Smart Meter
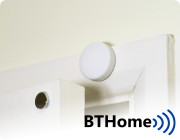 BTHome Door Sensor for Home Assistant
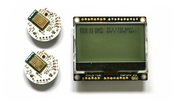 Pixl.js Wireless Temperature Display
 Turning an Espruino Puck.js Into a Universal Presentation Clicker
 Interfacing to a PC
 Puckmote - Universal Remote Control
 IoT for Kitchen Gardens
 Time Machine Retro-Inspired Smartwatch
 Talos, Keeping You Safe During Your Commute
 Bluetooth Energy Usage Monitor
 Electric Skateboard Controller
 Wooden Bluetooth Remote for Lego Duplo Train
 Ikea Eneby Speaker Controller
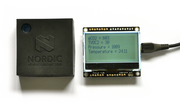 Pixl.js Wireless Weather Station
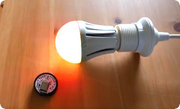 Temperature Controlled Night Light with Puck.js
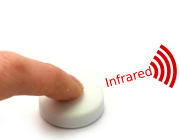 Infrared Record and Playback with Puck.js
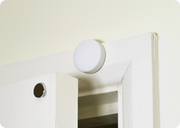 Door Controlled Light with Puck.js
 Freezer Alarm
There are many more tutorials that may not be specifically for you device but will probably work with some tweaking. Try searching to find what you want.
Information
- For detailed technical information about Bangle.js 2, check out the Bangle.js 2 technical information page
- CAD files for the Bangle.js 2 stand, as well as an STL of the watch body is available here
- The Espruino board file for Bangle.js can be found here and contains pinouts and other configuration info
- There's a Bangle.js 2 API reference here
- Don't want to use Espruino and want to develop your app bare-metal in C? Check out the example in the BangleJS2BareMetal repository
Certifications:
- Links to CE/RED report and FCC ID 2AKUO-10 Certifications
- Links to shipping documentation: Battery UN38.3
Power Consumption
- Idle, accelerometer on 12.5Hz - 0.3mA
- Idle, accelerometer on 1.25Hz (
Bangle.setPollInterval(800)) - 0.15mA (default if not moved for ~120s) - Idle, clock (
s7clk) updating once a second - 0.5mA - BLE Connected in high bandwidth mode - 0.75mA
- Compass on, 12.5Hz - 1.2mA (+0.6mA)
- Compass on, 1.25Hz (
Bangle.setPollInterval(800)) - 1.0mA (+0.2mA) - Heart rate monitor on - 1.0mA (+0.7mA) (KickStarter version = ~1.5mA)
- 100% CPU usage running JavaScript - 4mA (+3mA)
- GPS on - 26mA (+25mA)
- GPS on (set to GPS only) - 20mA (+19mA)
- LCD touchscreen enabled (unlocked) - 2.8mA (+2.5mA)
- LCD backlight on - 17mA (+16mA)
- Turned off (Bangle.off - no RTC) - 0.02mA
- Turned off (Bangle.softOff) - 0.03mA
Right now you can expect around 1 month of battery life with a clock that updates once a minute, using the latest firmware.
A clock that updates once a second all the time (like s7clk)
will reduce the battery life to 2 weeks, and more complicated clocks can increase the power
draw further.
LCD Screen
Bangle.js displays the REPL (JavaScript console) if Debug Info: show has
been set in settings. If enabled, any calls like print("Hello") or console.log("World") will output
to the LCD when there is no computer connected via Bluetooth. Any errors generated when there is no
connection will also be displayed on the LCD.
Graphics
You can output graphics on Bangle.js's display via the global variable g
that is an instance of the Graphics class. Unlike Bangle.js 1,
the display is buffered so changes to the display will only take effect when you call
g.flip() or your code finishes executing and Bangle.js returns to idle.
// Draw a pattern with lines
g.clear();
for (i=0;i<64;i+=7.9) g.drawLine(0,i,i,63);
g.drawString("Hello World",30,30);
Menus
Bangle.js comes with a built-in menu library that can be accessed with the E.showMenu() command.
E.showPrompt() and E.showMessage() can also be used for simple
prompts and full-screen messages.
// Two variables to update
var boolean = false;
var number = 50;
// First menu
var mainmenu = {
  "" : {
    "title" : "-- Main Menu --"
  },
  "Beep" : function() { Bangle.beep(); },
  "Buzz" : function() { Bangle.buzz(); },
  "Submenu" : function() { E.showMenu(submenu); },
  "A Boolean" : {
    value : boolean,
    format : v => v?"On":"Off",
    onchange : v => { boolean=v; }
  },
  "A Number" : {
    value : number,
    min:0,max:100,step:10,
    onchange : v => { number=v; }
  },
  "Exit" : function() { E.showMenu(); },
};
// Submenu
var submenu = {
  "" : {
    "title" : "-- SubMenu --"
  },
  "One" : undefined, // do nothing
  "Two" : undefined, // do nothing
  "< Back" : function() { E.showMenu(mainmenu); },
};
// Actually display the menu
E.showMenu(mainmenu);
See http://www.espruino.com/graphical_menu for more detailed information.
Terminal
Bangle.js's LCD acts as a VT100 Terminal. To write text to the LCD regardless of
connection state you can use Terminal.println("your text"). Scrolling
and simple VT100 control characters will be honoured.
You can even move the JavaScript console (REPL) to the LCD while connected via Bluetooth, and use your bluetooth connection as a simple keyboard using the following commands:
Bluetooth.on("data",d=>Terminal.inject(d));
Terminal.setConsole();
Screenshots
On Bangle.js 2, there's an offscreen buffer for the display (described above). As a result it is possible to create a screenshot of what's on the display with a simple command. Just type:
g.dump()
In the left-hand side of the IDE. The contents of the screen will then be copied into the Web IDE. From there you can copy or even right-click and save to a PNG file.
On-device Peripherals
Most peripherals on the device are accessible via fields and events on the Bangle object.
Touchscreen
Bangle.js 2 has a full touchscreen.
Bangle.on('touch', function(zone,e) { ... }); will call the function
with e as an object containing {x,y} every time the screen is tapped (when unlocked).
Bangle.on('drag', function(e) { ... }); will call the function
with e as an object containing {x,y,dx,dy,b} whenever a finger
is dragged over the screen. b is 0 when the finger is lifted
or 1 when pressed.
Bangle.on('stroke', function(e) { ... }); will call the function
with e as an object containing {xy:newUint8Array(x1,y1,x2,y2,...), stroke:string/undefined} whenever a
finger has been dragged over the screen for more that half the screen's distance.
stroke will only be set in the stroke event if Bangle.strokes has been set up with
a series of strokes to recognise. To do this, use some code as follows. The array
passed to Unistroke.new needs to be a Uint8Array of XY coordinates (as you might
get from xy in the stroke event).
Bangle.strokes = {
  up : Unistroke.new(new Uint8Array([57, 151, 57, 147, 58, 136, 61, 119, 65, 102, 70, 88, 74, 78, 80, 71, 86, 70, 94, 72, 107, 79, 129, 97, 140, 110, 147, 120, 152, 127, 156, 134, 158, 137])),
  cw : Unistroke.new(new Uint8Array([91, 60, 93, 60, 98, 60, 108, 60, 121, 61, 131, 64, 137, 70, 139, 81, 139, 96, 135, 111, 128, 126, 119, 136, 108, 140, 97, 141, 86, 139, 75, 134, 70, 126, 66, 115, 64, 100, 65, 88, 69, 78, 75, 71, 81, 67, 84, 63])
),
 ccw : Unistroke.new(new Uint8Array([114, 71, 112, 71, 108, 71, 102, 71, 93, 72, 82, 76, 71, 81, 62, 88, 56, 97, 53, 107, 54, 116, 59, 127, 70, 137, 86, 142, 103, 145, 115, 144, 124, 143, 131, 136, 135, 122, 131, 99, 124, 83, 115, 72])
),
 alpha : Unistroke.new(new Uint8Array([161, 55, 160, 58, 158, 62, 155, 71, 149, 81, 141, 97, 132, 114, 119, 129, 107, 140, 96, 147, 86, 151, 77, 154, 69, 153, 59, 149, 49, 143, 40, 133, 31, 117, 28, 104, 27, 90, 28, 78, 34, 71, 44, 69, 60, 72, 84, 84, 111, 107, 132, 128, 146, 144, 154, 155, 159, 161])),
 right : Unistroke.new(new Uint8Array([49, 52, 54, 52, 68, 57, 90, 65, 114, 76, 134, 84, 148, 91, 157, 95, 163, 98, 167, 100, 169, 102, 168, 105, 163, 114, 147, 126, 127, 137, 107, 147, 94, 152, 82, 156, 72, 159])),
double : Unistroke.new(new Uint8Array([75, 61, 87, 61, 117, 68, 142, 85, 147, 111, 129, 134, 92, 140, 59, 133, 45, 116, 50, 89, 86, 72, 128, 88, 138, 121, 108, 138, 68, 129, 56, 104, 57, 90]))
};
LED
There are two 'fake' LED variables called LED1 and LED2 that create red and
green fake LEDs at the top of the watch screen - these serve no purpose other
than to allow tutorials for existing Espruino boards to be used.
If you want to control the backlight LED use Bangle.setLCDBrightness.
Vibrate
Bangle.buzz() will make Bangle.js's vibration motor turn on. It takes optional
time and strength arguments, and returns a promise. See the reference.
For example:
Bangle.buzz().then(()=>{
  return new Promise(resolve=>setTimeout(resolve,500)); // wait 500ms
}).then(()=>{
  return Bangle.buzz(1000);
}).then(()=>{
  console.log("Done");
});
Will do a short buzz followed by a long buzz and will print Done when finished.
Sound
You can use Bangle.beep() in much the same way as .buzz above to make sounds. See the reference.
To output an entire scale of notes, you could do:
Bangle.beep(200,207.65*8).then(
()=>Bangle.beep(200,220.00*8)).then(
()=>Bangle.beep(200,246.94*8)).then(
()=>Bangle.beep(200,261.63*8)).then(
()=>Bangle.beep(200,293.66*8)).then(
()=>Bangle.beep(200,329.63*8)).then(
()=>Bangle.beep(200,369.99*8)).then(
()=>Bangle.beep(200,392.00*8)).then(
()=>Bangle.beep(200,440.00*8));
Note: Bangle.js 2 does not contain a piezo speaker, but instead uses the vibration motor for sound. This means that while you can get some sound, it is extremely weak.
Buttons
There is just one button on Bangle.js - called BTN or BTN1 in code.
- You can access a button's state with
digitalRead(BTN1)orBTN1.read()(the two commands are identical).BTNis also defined, and is the same asBTN1. - Polling to get the button state wastes power, so it's better to use
setWatchto call a function whenever the button changes state:
setWatch(function() {
  console.log("Pressed");
}, BTN, {edge:"rising", debounce:50, repeat:true});
Accelerometer
The accelerometer runs all the time and produces accel events on the
Bangle object.
Bangle.on('accel', function(acc) {
  // acc = {x,y,z,diff,mag}
});
See the reference for more information.
Gestures
When a sudden movement is detected, the accelerations in it are recorded
and a gesture event
is created.
If .tfmodel and .tfnames files are created in storage, Tensorflow
AI will be run on the model with the gesture information and an
aiGesture event
will be created with the name of the detected gesture.
Compass
The compass can be turned on with Bangle.setCompassPower(1) and when
enabled, mag events are created 12.5 times a second:
Bangle.setCompassPower(1)
Bangle.on('mag', function(mag) {
  // mag = {x,y,z,dx,dy,dz,heading}
});
See the reference for more information.
Barometer / air pressure sensor
To use the barometer, you can either request one pressure value:
Bangle.getPressure().then(print)
// prints this after ~1 sec
// { "temperature": 23.03918464465, "pressure": 1005.56287398937, "altitude": 64.19805781010 }
Or can request to be notified on each new reading:
Bangle.setBarometerPower(true)
Bangle.on('pressure', print)
// prints...
{ "temperature": 23.14690527655, "pressure": 1005.79911673786, "altitude": 62.21919777595 }
{ "temperature": 23.14200888113, "pressure": 1005.84599901953, "altitude": 61.82653852506 }
{ "temperature": 23.14200888113, "pressure": 1005.79091150423, "altitude": 62.28792165657 }
{ "temperature": 23.14690527655, "pressure": 1005.79911673786, "altitude": 62.21919777595 }
See the reference for more information.
GPS
The GPS can be turned on with Bangle.setGPSPower(1) and when
enabled, GPS events are created once a second:
Bangle.setGPSPower(1)
Bangle.on('GPS', function(gps) {
  // gps = {lat,lon,alt,speed,etc}
});
GPS-raw events are also created containing a String for each
NMEA line that comes from the GPS receiver. These contain far more
detailed information from the GPS.
See the reference for more information.
Advanced GPS
For more information GPS commands see the Technical Information Page
Hardware SWD
Bangle.js 2 has the hardware SWD pin brought out on the back of the watch along with the charging pins:
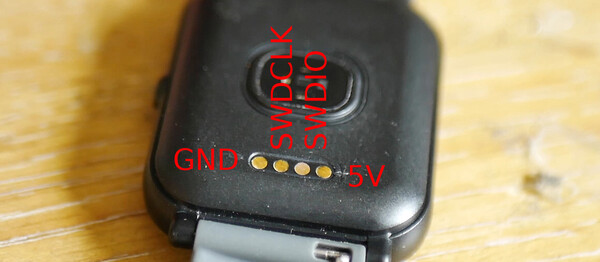
For more information see the Technical Information Page
Firmware Updates
Bangle.js 2 firmware updates must be performed over Bluetooth.While there is a USB charge cable, it is for charging only and USB firmware
updates are not possible. For wired firmware updates see Hardware SWD above (but this is only useful for firmware development).
App Loader
Bangle.js 2 provides its own firmware update mechanism using the App Loader.
On Bangle.js 2 this is the recommended method (although other methods still work). Simply click on the ≡ icon
to the right of the Firmware Update app and follow the instructions.
The firmware will upload to Bangle.js, and when it is complete, Bangle.js will restart and install the firmware.
Note: KickStarter Bangles that shipped with 2v10 firmware will have 2v10 bootloaders
which need updating before you use the firmware updater. Just follow the instructions on
the Firmware Update page to update your bootloader.
DFU
Please see the Firmware Update page for detailed instructions.
Troubleshooting
Check out:
- The Bangle.js Wiki and FAQ
- Bangle.js Troubleshooting
- Bluetooth Espruino Troubleshooting
- General Espruino Troubleshooting
Other Official Espruino Boards
This page is auto-generated from GitHub. If you see any mistakes or have suggestions, please let us know.
